Tuesday, March 31, 2009

Tuesday March 31st


The CD is dead... Not in the sense of music, or because of pirating, but because it doesn't hold enough. My first digital camera was a Sony point and shoot that was 1.2megapixels. My cell phone camera has better resolution than this thing had. For that camera I bought a "big" 32mb disk that would hold almost 2000 images! Today I use 8 gig cards that only hold 700 images in JPEG fine. With that old camera there was never any problem getting all of my images onto a cd for storage, or distribution, but today CD's are a thing of the past. I can only fit 1/11th of my images off of a single card onto a CD. So what do we do? We use DVD's. But wait, the normal DVD-R only holds 4.7gigs, that won't hold all of the images from one card either. We now have to turn to Dual Layer DVD's that hold 8gigs. This is just enough space to hold all of our data from one card... but they cost about 10times the price of a blank cd. As technology changes, and we get more and more pixels onto a sensor we increase our overall file size. This in turn makes us buy more and more storage space to back our images up. There really is no end game here. Our storage needs are going to keep increasing, and the available storage media is going to increase right along with it. My goal is to make a concerted effort to take less photos. I want to take less photos that don't mean anything, or are just plain bad and concentrate on only pressing that shutter when I have something worth viewing. Ok off of my soap box for today.

If you've never had any experience with a studio strobe check out David Hobby's articles on them Here . David does a good job of explaining how they work, what all of the switches do, and more importantly, how to light with them.

A quick reminder. Everyone go backup your images NOW. Don't put it off until tomorrow. You could walk away today and the drive could fail and that would be it. Best Buy has a 500gig external hard drive on sale HERE for 89.99. With prices like that, there's really no reason we shouldn't be backing our images up.

Also for anyone that doesn't know, Shop Bellevue is going on this Friday. The Shops in our business district stay open until 9PM. They do this the first Friday of every month. This month however there is an extra reason to come down and participate in it. Each shop has been given 24 Easter eggs with prize in them from the shops in Bellevue. every shop you walk into is supposed to give you an egg, so visit all of the shops you can. The grand prize is a really nice gold ring from our local jewelry store. It has a nice diamond in it, as well as some gem stones around the outside. We look forward to seeing you there! Our address is 421 Fairfield ave. Bellevue Kentucky 41073. Jason Read more on this article...

Monday, March 30, 2009

Monday March 30th


Gotta love that wide angle... This shot was taken at the St. James church on Sunday where we were shooting some stuff for their website. It was taken with a 17-35 2.8 on a D700. The thing is, with a full frame you get this wonderful wide view when only at 17mm. I love it. Unfortunately it's Shad's not mine, but I can still enjoy looking at it. We wanted to publicly thank the St. James Church for inviting us to photograph their wonderful facilities.

I noticed something lately that got me thinking about my style of shooting, and I wanted to share it with you. I notice that some people tend to "overshoot". They keep their camera in continuous shooting mode and instead of taking one picture at a time, they take three or four. There are various reasons for this, but when I've asked the people doing it why, the most common answer is this: " well I figure that if I shoot a bunch I'm bound to get one good one". Is this where the digital world has brought us? Are we so lazy that we don't want to take the time to COMPOSE the image. Are we unable to get the shot right so we just "spray and pray"? I don't think so. Unless I'm shooting something that is moving very fast, I don't take my camera off of single shot mode. I don't need to take 15 photos of someone sitting next to a beautiful lake. Instead I would rather spend the extra time changing the composition and seeing if a different perspective makes the image better. Instead of holding down the shutter button, stoop down, move to the right or left... Do something, anything to make the image different. You'd be surprised how much it will better your images. You will grow as a photographer. Maybe this is a rant, or I'm just tired but I thought it important to share with you. If you are one of these people, try to slow down a little and make it count in the first frame, instead of the 15th... See you all tomorrow. Jason Read more on this article...

Wednesday, March 25, 2009

Two more things that just came up

First, I realized that I didn't say a word about the image I posted up. It's a photo I took of a train in Parrish Florida. It was shot with a 17-50 2.8 at around f/13 ISO200...

Second: My photojournalist friend Breanna has an interesting article on being "Too social" on social networks HERE . Basically follow these rules: if you wouldn't want your mom, boss, priest, or tax man to know about it, don't post it on the Internet! The Internet is a form of communication. If you post it online, people are going to see it... Besides no one wants to see your drunken crap camera phone pictures anyway. Read more on this article...

Wednesday March 25th


I was visiting my daily reads this morning and it's guest blogger wednesday over at Scott Kelby.com. He has Joe McNally on talking about his new book The Hot Shoe Diary's. It's really a good read (both the Blog and the book).

I was catching up on my Photoshop User TV yesterday and they had an interesting guy with an interesting product on. The mans name is Michael Tapes, and the product is Lens Align. It's a really cool product to help with the calibration of your lenses. Many people don't know this, but lenses don't work the same from camera body to camera body. Even if it's the same model camera the lens may focus slightly different on one than it does on another. Manufacturers build lenses to stay within a tolerance. Even within that tolerence you can get a "not so crisp shot". This can be fixed with the lens align system. Check it out it's a great product.

On another note I think some of us are going to get together for a little photoshop instruction this Friday. If you are interested let me know. We're going to be at the studio in Bellevue. If you can't make it but want to learn, let me know and we can arrange to get together on another day.

That's it for the moment. Gotta get back to some editing. I'm sure I'll drop some more info or links or something later today. Make sure to check back. Jason Read more on this article...

Tuesday, March 24, 2009

This is Scary!!

So I was doing my daily surfing and I stopped by Terry White's Blog. He is a photographer but more than that he is a tech guy. He appeals to my inner tech geek. Anyway, I was checking out his "favorites" section and stumbled upon Andy Greenwell's site. He is a photographer from Michigan who calls himself a "touch up artist". Well when you guys click on his site link above it takes you strait to his "touch up before and after page" and you'll see for yourself he's a regular doctor Frankenstein! He has made some downright FUGLY women look beautiful! That's the kind of misrepresentation that gives us photoshoppers a bad name! : ) hope you enjoy it as much as I did. PS be sure to click on the picture of the legs to see what magic he worked there. Read more on this article...

Tuesday March 24th


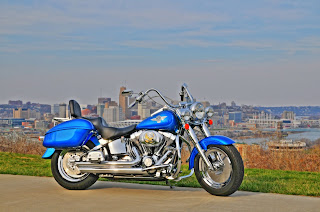
Sorry for the long lapse in posts. About 4 or 5 days into my vacation I broke the LCD on my laptop and I didn't have anyway to get online except my blackberry. I couldn't really post much from there so I figured I'd just wait until I got back. We got back to town Sunday afternoon after a long drive, and it's great to be home. I got right back to work yesterday with 4 photo shoots for United way, then to our favorite hillside shooting location Devou park in Covington to shoot a motorcycle for our friend Ed McDonald. As you can see above it turned out great. I know I have said in the past that I don't like HDR so much because it's kind of "cheating" but I really like the way this one turned out. I think Ed will be happy and hope you guys like it too.

Here's another quick shot from the motorcycle shoot that I went ahead and added a little patriotic flair.
Photobucket

Here's a little how to on how I did it. First I opened the main image (the motorcycle) and I did all of my normal color adjustments on there(levels, curves,etc.) then I went to istock photo and downloaded a large waving flag image. I then went back to my original image and made a copy of the background layer by dragging the background layer to the new layer tab at the bottom of the layers box. Once this was done I selected the first background layer, then pressed the new later tab making a blank layer between the original background layer and the background layer copy. At this point click the little eye next to the background layer copy to turn it off, we'll turn it back on later. Next I opened the flag image into photoshop. I selected the entire image and copied it and pasted it into the new blank layer. Then I went to the top of the page and selected EDIT-FREE TRANSFORM. I sized the flag over the carb cover until I got it where I wanted it and then double clicked the flag to set it there. Now click the eyeball again next to the background copy layer and the flag disappears. Don't worry, it's still there. Now you want to select the background copy layer by clicking anywhere on it. Then at the bottom of the layer box you will click on the layer mask icon. (it's the gray box with the white circle in it) Now you will have a layer mask on your background copy layer. Select your brush tool, then make the opacity something like 35%. Make sure you have black selected as your foreground color, and start "painting" over the area in the image that you want to see the flag. If you click a little too much and don't want the flag to come through as much, just change to white and paint back over that area. "Paint" until it looks like what you want. Have fun!

That's it for me today. I'm beat, and we still have a lot of shooting left to do this week. See everyone tomorrow. Jason Read more on this article...

Wednesday, March 18, 2009

Wednesday March 18th


Are you "that" guy/girl? Are you that person walking around the theme park, or carnival with your kids on your right, and your super mega pixel SLR and 500mm slung on your hip? Are you not able to have a good time with your family because you're too busy worrying about your multi thousand dollar setup? I was... but not anymore! I'm done. No more hauling my SLR's and lenses with me to take standard, boring "vacation" or tourist style pictures. I can take those with my wife's crappy point and shoot. If you're not able to have a good time, what's the point? I walked around Disney world for 12 hours yesterday and had a BLAST! Not just because I was there with my family, but because I wasn't worried about my camera, or composing a picture of my kids. I was free to ride rides, enjoy the kids enjoying themselves and have a good day. There were all sorts of people there lugging around the SLR's and spending so much time on that stuff that they couldn't enjoy just being there... But I digress.

It's been a great few days down here in Florida. We've enjoyed wonderful weather, and even better food. It's almost time to get back to the grind of life but until I do I plan on getting lots more shooting in! The biggest thing that I plan on trying to shoot is some HDR. I'm hoping to do some HDR from under a peir and of the ocean. I'll let you know how it goes.

On the HDR theme I recently discovered the program that Matt Kloskowski uses. It's called Photo Matix . I have been playing with this program for a few days, and I have to tell you that it blows the HDR converter in Photoshop out of the water hands down. It has a really nice interface, and it makes it really easy to do a HDR conversion.

Nikon has started shipping the new 35mm 1.8 . For $200 I'm going to get one just to play with. It will give you an effective focal length of 50mm which is just about perfect for portraits.

Thanks for reading everyone! I have a lot more stuff to write about, but lets face it, it's 80 degrees and I'm staying on a beach... So that's it for me today! Jason Read more on this article...

Sunday, March 15, 2009

Sunday 3-15-09


Day two here in beautiful Bradenton Florida. We went to the local oyster bar last night and had some wonderful seafood. After dinner we went back to watch the sun set for a second night. There were some clouds so we didn't get quite the scene that we had the night before, but I got this wonderful photograph of My grandparents and some of their friends. The key here was to balance the ambient with the flash. ISO 200 27mm f/2.8 1/15 of a second.

The key to getting the exposure correct is starting with the unchangeable. You have to set your shutter speed for the ambient. Remember that the shutter speed controls the amount of ambient light that the photo gets. Once you get your shutter speed set for the background scene you then have to adjust your aperture for the flash. In our case here we shot at f/2.8 because I had the ISO so low. What you come up with is a properly exposed background and a properly exposed subject in the foreground. I was using the TTL with Nikon's CLS system so my flash output adjusted automatically for me. Alright, off to enjoy the weather. More tomorrow. Jason Read more on this article...

Friday, March 13, 2009

3-13-09


So after 22 hours, 5 inches of snow and 1000 miles, we made it to Florida today. As soon as we got here we grabbed a quick dinner and hit the pool/beach. I just caught as the last little bit of the sun setting. It was shot in manual, 50mm f/11 1/125 I happened to forget to set my ISO back down to 200 so it was still at ISO800. The image was a little noisy so I ran it through my favorite noise software Noise Ninja . I have to tell you Noise Ninja is one of the best noise programs out there. It comes in two versions, one is just a stand alone version and one is the plug in version. I use the plug in version with photoshop CS3.

Here's a quick snapshot of how the plug in looks when you run it: Click on the image to see it full sized.

Photobucket

What I do is hit the "profile image" button on the lower right hand of the screen. Once the program looks at the image and determines how much filtering it needs, it will place little red boxes around different points in the image. Click the OK button and you're done. This will apply the noise filtering to the image. There are other adjustments and fine tuning that you can do within the program but I haven't found a situation where the program didn't do the correct amount of filtering. Here is the image after I finished with my adjustments: Click on the image to see it full sized.

Photobucket

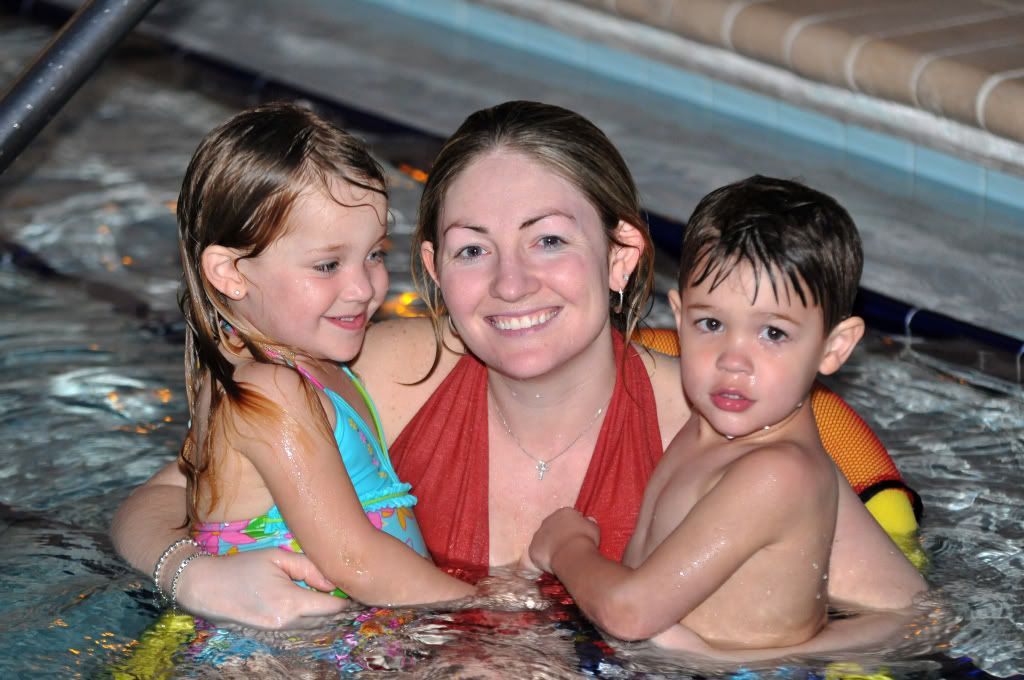
You can see I was shooting wide open because the focus is sharp on Dawn's face and her eyes, and falls off quickly as it gets to my son and daughter. Anyway, if you have noise in your images get a copy of Noise Ninja . I have another 9 days here so look for more beautiful sunset and ocean photos. I'm on vacation but I'll be on top of the blog. See you all tomorrow. Jason Read more on this article...
Thursday, March 12, 2009

Thursday March 12th 2009


Is it just me is Joe McNally still wearing glasses from the 80's? I was just watching the latest episode of Dtown and Joe is on there talking about light and flash, but I couldn't help but stare at his "old" glasses. They kill me. The man probably makes a million+ a year. Buy some new glasses! Just kidding Joe...

Ok enough about the glasses. I'm writing this in somewhat of a hurry because I'm packing for Florida. I am heading down for a week of lounging in the sun and watching a little spring training with the Reds. I can't wait. While I'm there I may be involved with a shoot or two, we'll see how that works out. I'm actually waiting on an email back from a guy, but I'll post some photos up when I get them.

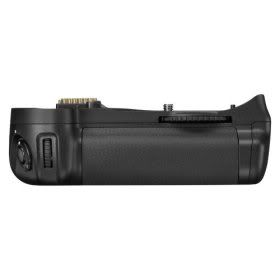
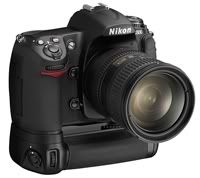
Real quick today, I thought I would talk about one of my favorite accessories. I have touched on it a little bit in the past, but I have never really gotten in depth with it. The battery grip I use is the MB-D10 with my Nikon D300. This grip will actually work with the D700 as well. Here is what the grip looks like:

Photobucket

and here is what it looks like on the camera:

Photobucket

Many people think battery grip and they think "extra battery". This is true, but it's not the only advantage of the Battery grip. The added size and weight of the grip make it balance really nice in the hands when you have a heavier "pro" lens on there like the 70-200 2.8. I have rather large hands, and while the D300 alone didn't feel small, I really like the way if feels with the extension on the bottom. Again, it's personal preference. To go along with the added battery and better balance, you get a vertical shutter release. This is another shutter release button that makes it easy and convenient to release the shutter when holding the camera vertical. There is also a control pad on the grip so that you can quickly move through photos or move AF points without taking your hands off of their positions on the camera. Battery grips come for just about all models of camera, and if they don't make one from the manufacturer you can definitely get one aftermarket.

Listen it's time for me to get going, but I'll post from the road, and maybe even from the beach! Jason Read more on this article...

Tuesday, March 10, 2009

Photoshop User TV

For those that don't follow or that haven't looked yet the newest episode of Photoshop User TV is up. Number 176. I haven't watched it yet, but I'm sure it'll be good, they all are. Jason Read more on this article...
Tuesday March 11th


So Pocket Wizard sucks... Ok not really. They are just keeping us Nikon shooters chomping at the bit so to speak for the new transmitters. Pocket Wizard announced a tentative release date of June 1st for the Nikon version of the pocket wizards. As soon as Adorama or K & R offers a pre-order, I'll be placing my order. I can't wait. Honestly they will be about the same as having the Radio Poppers for doing the TTL off camera flash, but with the added ability to do studio strobes, I'm not sure that the transmitter will ever come off of my camera. ;~)

I found a really cool blog yesterday. It's not a strictly camera related blog like most that I read, but it appeals to my tech side. I have a strong computer background and anything that is new technology, or electronic usually gets my interest. Terry White a good friend of Scott Kelby's puts on this tech blog. He writes about technology that he uses or that affects him personally. Everything that he writes about, he tries out first hand, so it's an honest opinion of the gear. I'm going to follow it, and while I may be a little more "techie" than the average person, it's still worth a look.

For you photoshop users out there, I found a great little site that has a list of a TON of free actions that you may want to check out. It's located Here . Go check them out, save a few to your computer and save yourself some time when it comes to photoshop. The less time you spend editing photos, the more time you have to go out and take the photos!

Some people, ok Amy... was asking about light stands and umbrellas at the class on Saturday. Here is a link to Midwest Photo Exchange's "strobist" equipment. They work with David Hobby of the acclaimed Strobist to get the gear and packages for everyone who wants to use light weight flash units for location shoots instead of strobes. They have some of the best prices on that stuff. Talk to Lynn, and she'll take care of you.

Alright, that's all I have for today. I'm busy planning my getaway, I mean trip to Florida. See everyone tomorrow! Jason Read more on this article...
Monday, March 9, 2009

Workshop


Hey I want to thank you guys that came to the workshop on Saturday. We had a good time, and hope to work with you guys soon on more specific topics. From now on we're going to be having our workshops at our studio in Bellevue because it offers more possibilities, and learning tools. Plus we have the place, might as well use it instead of paying to rent a place. Anyway glad you all made it, and I hope you learned everything you came to learn. Read more on this article...

Saturday, March 7, 2009

Quick one


We were officially open for business last night. We got our business permit yesterday afternoon just in time to take part in Shop Bellevue. The first Friday of every month all of the shops in Bellevue are open from 6 to 9 PM. It was a great success. We had city council members stopping in, we even had Santa stop by in his springtime gear.

What you see above is a shot of my buddy Denver. He stopped by on his motorcycle(I think to remind me that I need another one) so we took a couple of quick photos. Well I'm off to our workshop. See you all Monday. Jason Read more on this article...

Friday, March 6, 2009

Photojournalism


Good morning everyone, Sorry I took the day off yesterday. I had two sick kids and didn't get any time away from that. Today I want to highlight a fellow photographer Breanna Gaddie . She is a photojournalist working with the City Beat as well as The Northerner which is NKU's student paper. Bre stays on top of the current happenings in the world of the photojournalist, where I must confess I don't have a lot of experience with. Check our her blog by clicking her name above.

Mark your calenders for June 9th. David Ziser is going to be in Cincinnati with his Digital Wakeup call 2009 tour. For $79 you can learn the tips and tricks from one of the most well known wedding photographers in the country. Well worth the money.

That's all I have today. It's beautiful out, my twins feel better, and we're going to the park. Get out and shoot! See ya tomorrow at the workshop! Jason Read more on this article...

Wednesday, March 4, 2009

Hey Mr. DJ


This is one of my favorite images from the Pink Launch party. Yes there were tons of hot women running around in scantly clad clothing. And yes I took lots of pictures of all of that, but I just enjoy looking at this image. Maybe it's my love of music, or maybe it's because I enjoy watching a good DJ do his thing. Whatever the reason, I thought enough of the image to share it with you guys. The technicals of the shot were pretty simple. I had the on camera flash pointed directly at him but dialed down almost a full stop. I also had a stand mounted flash to the camera right with a red gel on it. This is what produced the red you see on him. In hind sight I think I could have dialed down another stop on the on camera flash to let a little more of the red in. Either way, I hope you all enjoy it as well.

Today I'm going to jump into some circular polarizer stuff. Lots of photographers(especially landscape photographers) consider the circular polarizer a must have item. The main thing that people use polarizers for in photography is increased contrast(even if they don't know it) There are some very helpful images Here that show the difference between an image taken with a polarizer and without. With the use of a polarizer the greens become more dark green in the trees and the blues of the sky become a deeper shade of blue. The second most sought after effect from a polarizer is reduced glare. Again if you reference the photos at that link I provided above, you will see the dramatic difference that a polarizer makes on photographs that include water, or a window. There is no glare to deal with. This makes things really nice when doing a beach shot, or a photo of someone through a window.

I'm not going to go into the math, and laws behind how a polarizer works because quite honestly I don't know them, and I'd just be rewording what I read somewhere else. I will however give a brief description of how to use them. They attach to the end of your lens like any other photo filter. They screw directly into the barrel threads on the end of your lens. Unlike most other filters though, they are two piece filters. There is the element that screws into place to hold the filter, and there is a second "ring" that you can turn freely. This ring adjusts the effect the filter has on your image. You can look through the viewfinder and turn the outer ring until you get the effect that you like. Once you do, press the shutter. It's that simple.

There are some downfalls to a CP filter though, the biggest is that it reduces your light by a stop or more. Meaning if you are shooting at f/4 without the filter when you place the filter on , you'll be shooting at f/5.6. That's just how it works. Just keep that in mind when you are setting up for the shot, especially if you are in manual mode. This can be important. Hope this helps explain a little about Circular Polarizers. Jason Read more on this article...

Tuesday, March 3, 2009

All in Pink


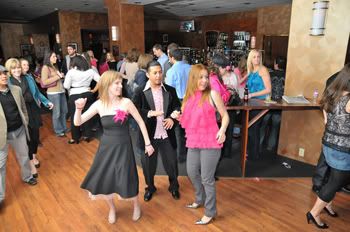
The beautiful ladies you see here are the owners of Pink Productions . This shot was taken of them at their launch party Friday 2-27-09. What you're looking at is 31mm f/4.5 ISO 1600 1/200. I had a Nikon SB800 mounted on the hot shoe firing at the ceiling to illuminate them. For the dance floor that night I had two SB600's mounted on light stands pointed at the ceiling. I was using the ceiling as a huge softbox since it was all white. It reflected the light back down onto the dance floor well.

In this picture you can see the dance floor and how well it is lit with just two speedlights:

Photobucket

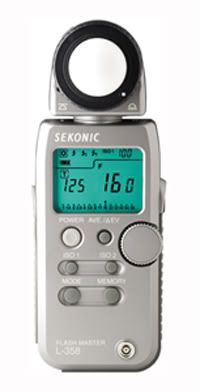
So I was looking around my bag this morning and I realized that I had a piece of gear that we hadn't talked about yet, a light meter. Light meters come in all shapes and sizes, and can be read just ambient, just flash, or both. They are sophisticated enough that you can fire your pocket wizard remote triggers with some models. The version I have is the Sekonic L-358 shown below.

Photobucket

This unit is the version that will do either ambient, or flash, and it will fire your pocket wizard radio transceivers for you. So you say to yourself, why would I need one of these? I have a meter built into my camera. Yes most of us do have meters built into our SLR'S but they are what's called TTL or through The Lens meters. They read reflected light off of the subject and make a determination off of that. They work great most of the time, but sometimes they just don't cut it. For example, if you are photographing someone wearing a white or black shirt, the TTL can be fooled. The TTL is designed to measure off of 18% grey, so that means that something that is all white or all black will not have anything with that 18% grey in it. Nothing neutral to meter off of, so it will make the person's shirt look muddied grey. This is where a light meter will be of use. Yes you can place a grey card in front of the person and meter off of that, but if you want to be exact, you use your meter. A light meter is uses incident metering. What this means is that it actually measures the light that is falling on the subject. To achieve this you place the meter directly in front of the object that you want to meter off of and take your reading there. This will give you the most accurate reading of light to produce the exposure. This is possible because of the small translucent dome on top of the meter. This is the light sensitive part of the meter that gathers the available light and makes the determination. The ball usually takes a reading from all angles, and areas provided, however with some meters you can do what's called "spot metering". Spot metering limits the area metered to a small point. The size of the point varies from model to model, but generally it is just a few millimeters wide.

The biggest plus side to meters is flash. Meters that read flash are a great tool for anyone using off camera flash units in manual mode, as well as studio strobes. With the flash meter you are able to set what your ISO is, what your shutter speed is, and then the meter will tell you what your aperture or f/stop should be to create the correct exposure. The way to achieve this is by setting the ISO, and Shutter Speed, then holding the meter either in front of your model or where your model will be, and "popping" the flash. The meter won't read until it senses the flash output. It will then take it's reading and adjust accordingly. There is not substitute for the precision and control of a meter. I would recommend that anyone wanting to get into off camera flash buy one. The Nikon CLS units are nice, and allow you to do a whole lot, but there are so many more creative things you can do with manual flash. The key to it though is being able to get the proper exposure, you can do this with a light meter. The inexpensive ones can be had for around $100, and the most expensive units run in the upwards of $1000. The unit that I have pictured above is made by Sekonic and is priced at a moderate $250.00. Minolta/Sony makes a nice meter as well. I would suggest getting one that does both ambient and flash, that way you don't limit yourself with one or the other.

Tomorrow we're going to talk a little about Circular Polarizers. See you then. Jason Read more on this article...

Monday, March 2, 2009

Get Close


I've been on hiatus for a while. I'm sorry. Last week I was really sick, and didn't do much of anything. But, a lot has happened in just a weeks time. Scott Kelby and Matt Kloskowski (the Photoshop Guys ) are doing a new weekly show sponsored by Nikon called Dtown. Basically they're going to be showing you tips and tricks every week for Nikon DSLR's. It's a really good show, and these guys know their stuff. Also for you Canon shooters, the New pocket Wizard's should be available today. There are some big rumors floating around about new camera's coming from Nikon. Rumor has it that they'll be out today or tomorrow. Most notable is a replacement for the aging D40 and a new version of the popular D700. We'll see what happens. So what is this shot above? Well it's obviously a butterfly... But it was shot with a 180mm Tamron Macro lens at the Butterfly show last year. I couldn't tell you for sure what type of butterfly this is, but I can tell you that it was very hard to photograph. It didn't want to sit still at all. I spent about an hour "chasing" this thing from branch to branch before I finally got this image. The finished shot makes it worth the effort.


Photobucket
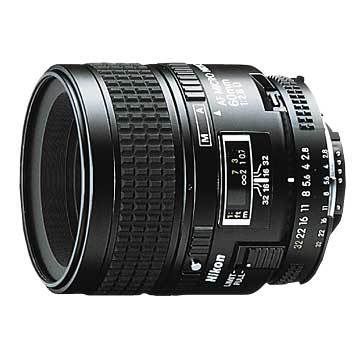
In that spirit(macro) I want to talk about a lens that is quickly becoming my favorite, the Nikon 60mm 2.8. This is one hell of a lens. It is from Nikon's pro line so it's metal build all of the way through. No plastic to be found on this lens. It has a fairly fast 2.8 max aperture, and focuses as close as 2 7/8 inch. This is close... The real beauty of this lens is that it's a true Macro. Meaning it has a 1:1 ratio. You will get the beautiful detail like you see in the image above. There are some limitations to working with this lens. To achieve the 1:1 ratio, you have to be as close as this lens will focus, or 2 7/8 inches away from your subject. This is fine for flowers and other inanimate objects, but for animals, you may spook them. Also when you're this close, you may have trouble lighting your subject. This isn't a problem if you have external lights(CLS) or if you are using a ring flash.

When it comes to sharpness, this is a great lens. This lens is tack sharp from corner to corner at normal portrait apertures of f/8-f/11. This lens makes for a great portrait lens, especially on a DX sensor. The AF-D version wont focus with a Nikon D40, D40x, or a D60, but the Newer AF-S version will. Unfortunately the Newer AF-S version isn't quite as sharp, but we're talking minimal amounts. Probably nothing you'd ever be able to notice. Listen that's it for me. Besides slacking on my blogging, I have been slacking on everything else too, so I have to get some other things done today. Keep checking back though, as soon as Nikon makes their announcement, I'll be all over it. See everyone later, Jason Read more on this article...