Tuesday, June 22, 2010

My Top 5 Favorite Plugins!


Hey everyone! Glad to see you here again! Today I want to show you some of the best plugins (in my opinion) for Photoshop. I have to tell you, I'm a huge fan of plugins because unlike(most) actions, they are totally adjustable and allow the artist to really push the boundaries of creativity, while still maintaining a low average time per image number. In general at my studio we try to spend an average of 60seconds per image. Anything we can do to maintain a quality product but lower our editing time is just increasing the profit margin. So hit the jump and see my Top 5 Plugins for Photoshop!


I have a host of plugin's that I use for different reasons. There is one that I use more than any of the others though and that's Nik Silver Efex Pro. This is part of a plugin package from Nik that includes quite a few other plugins that I also use just not as often. Silver Efex is used to convert to black and white. The reason I love it so much is that it gives you many options that mimic techniques used in the dark room. When you click on it, you get a display panel with many options. Here's an example of what it looks like:

black and white conversion

Notice the slider on the left hand side of the panel. That is where you chose your style of black and white conversion. There are options from neutral, to soft focus, to high contrast and many in between. On the right side of the panel you will see there are areas to fine tune these styles. You have the ability to adjust brightness, contrast, structure, as well as shadows, and highlights. This is a feature packed plugin that is the best b&w conversion method out there in my opinion.


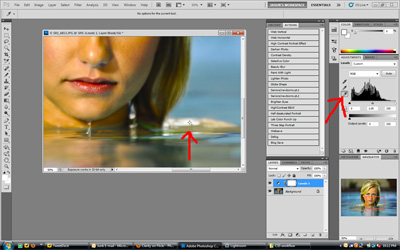
The second plugin that I use often is Noise Ninja. Just like it sounds, Noise Ninja removes noise. You can find Noise Ninja HERE. I think it's one of the best programs out removing Noise going right now(disclaimer: Photoshop CS5 has new Noise removal software built in that kicks butt. It actually does it's noise removal to the raw file as opposed to the Jpeg like all noise software out right now but I haven't used it too much yet). Noise Ninja has a separate panel that comes up just like other plugins. It auto profiles the image and shows you where the noise is with small colored boxes. It also gives you a preview box that shows what the "after removal" image will look like. There are sliders that allow you to vary the amount of removal. Here's what the control panel looks like:

noise ninja

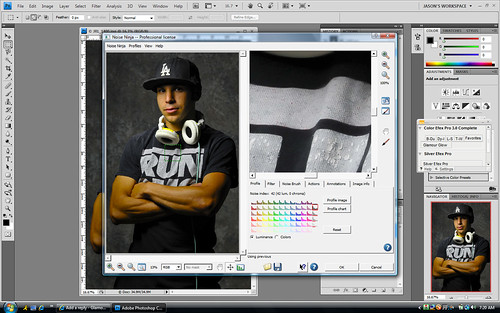
As far as plugins go, Noise Ninja is one of the most automated. I rarely use the sliders to very the amount of reduction. I find that the Auto Profile function works 99% of the time for me.

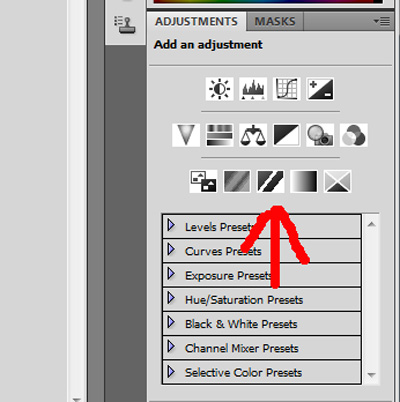
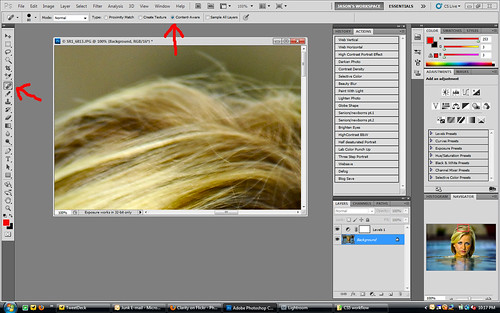
Another plugin that I have been using a lot lately is Vertus Fluid mask3. It's a masking program that works wonders. If you've ever had to mask something, or if you've ever wanted to remove a background, sky, or any particular part of your image and found it hard, this is the plugin for you. Get a free trial copy or download the full version HERE. Even with Photoshop CS5's new refining brush sometimes it's a lot easier to us the fluid mask. There are a couple of great video tutorials found HERE that explain in a lot of detail what all of the controls on fluid mask do. I find that the algorithm for fluid mask does a better job of detecting color and contrast change in an image than the quick selection or magic wand tools in Photoshop. Fluid mask allows you a lot of finite control over your masking that is second to none in the industry. If you have a lot of masking to do, you should definitely get Fluid Mask 3.


fluid mask

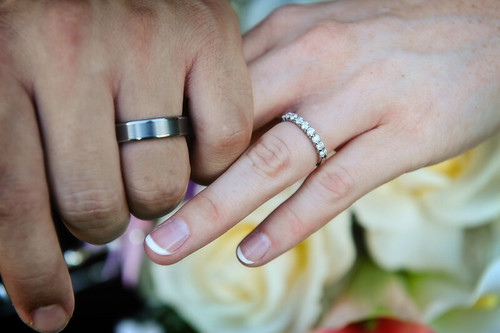
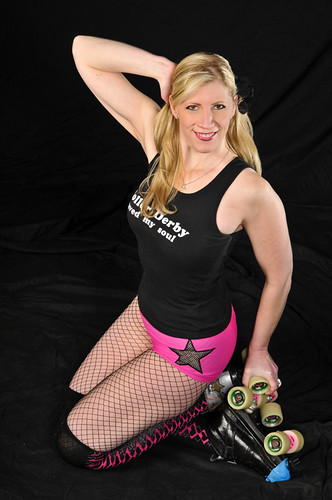
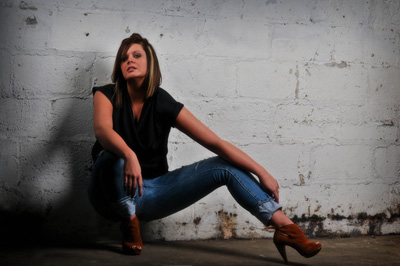
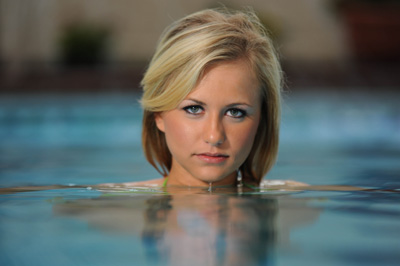
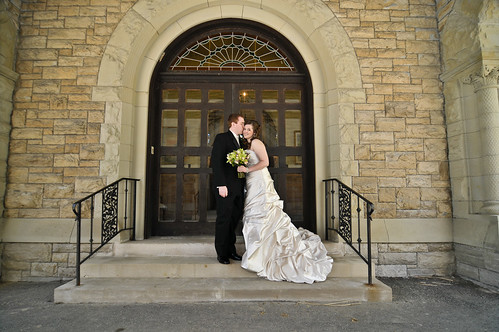
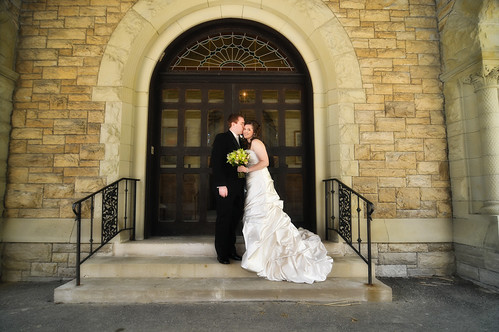
Along with the ones listed above, I use the Nik Color Efex pro which is similar to the Silver Efex pro. It has a similar display as the Silver Efex but it adds different color effects instead of black and white conversions. There are literally hundreds of effects to chose from inside of this panel, and just like the Silver Efex panels each style or effect, is customizable and able to be adjusted. Instead of showing you the display again, here is an example of my favorite color effect contained in it, glamour glow:
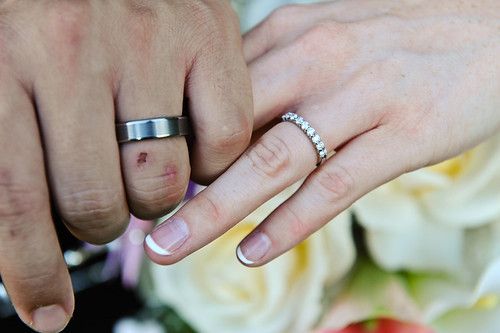
Before:
JRL_8863

After:
JRL_8863-Edit

Last but not least is Portrait Professional. Out of all of my Plugins I use this one the least but I still keep it there for when I really need to remove a ton of skin blemishes quickly. Unfortunately I don't have a screen shot of this plugin because it's actually on the fritz right now and I'm waiting on an email back from Anthropics, but you can download a copy of it HERE. What portrait professional does, is allows you to set predetermined points on the subject's face, then the program looks for skin imperfections, as well as areas that need "sculpting". It is infinitely adjustable, and best of all they provide you with software updates for free when a new version comes out. It really is a wonderful piece of software.

I think I'd like to try out some of the alien skin plugins but we'll see if that happens. I have in the past used On one's focal point, and it is a fun plugin to play with but I wouldn't use that for anything I was delivering to a client, just not my style. What are you guys/girls using? I'd love to hear in the comments section.

That's about it for me today! See you all next time! Jason

Read more on this article...

Monday, June 21, 2010

CS5 Goodness!


Hey guys! Welcome back! Hope everyone had a wonderful fathers day weekend. The twins and I floated around the pool all day which resulted in an awful sunburn for me... Guess I should have applied a little more sunscreen and a little less time tossing the kids ;~) All in all we had a great time though!

I have a confession to make.... I LOVE Photoshop! I don't think a day goes by that I don't open Photoshop to do some sort of editing or manipulation. When Adobe released the latest rendition named CS5 I had to have it the first day, and let me tell you it's a huge, huge improvement on an already (almost)perfect product. There are many improvements and refinements added to CS5 but today I want to show you the one that I use the most. It's called Content Aware and it's used in many different places throughout the CS5 platform. Hit the jump and read on...


Content aware is a new algorithm Adobe added for CS5 that changes the game. This new algorithm looks at the surrounding pixels and attempts to reconstruct the selected area with what it thinks "would have" been there. Photoshop CS4 had content aware scaling that allowed you to adjust the size of the image without distorting things, however the content fill in CS5 is a whole new level.

Even though it's used in numerous places throughout the CS5 platform, the place where I use it the most is under the SPOT HEALING BRUSH. The spot healing brush in previous versions of Photoshop did a pretty good job of "healing" blemishes and filling in other types of area for you. You usually had to return with the CLONE STAMP to smooth the edges or touch up some rough areas left by the SPOT HEALING BRUSH. No more! With CONTENT AWARE FILL the SPOT HEALING BRUSH automatically and seamlessly fills the selected area perfectly almost every time. Take a look below at a quick run through of how to use it.

SR1_8720

As you can see, the groom has some cuts and bruises on his knuckles that need to go. In the past I would have selected the finger with the lasso tool(to constrain the cloning) and used the CLONE STAMP tool to remove the blemishes. We don't have to do that anymore. You're going to select the SPOT HEALING BRUSH as shown below by the red arrow, and you want to make sure that CONTENT AWARE FILL is selected at the top of the screen(again shown with a red arrow).

Showing Brush and Settings

There is no need to select the finger with the lasso tool anymore. No need to worry about new layers like you would have with the CLONE STAMP. You are going to select your brush size(make it slightly larger than the area to be "HEALED") and simply paint over the area as shown here on the large cut on his ring knuckle:

removing first blemish

I "painted" over the cut, the area went black for a brief second while Photoshop was rebuilding the area, then MAGIC, it was healed. That's all there is to it. This works not only on skin and blemishes, you can remove almost anything with this method. Below is the final result.

SR1_8720

Now all of this new technology doesn't come without some drawbacks. When you add features like this, it requires resources. When I say resources I mean system RAM. Photoshop CS5 is a very resource hungry program. I have a dual core processor with 3 gigs of RAM and it works fine, but just be aware that you may need to add RAM or upgrade components to use all of the features of CS5.

I posted this link before, but I think it's such a great resource that it needs re posting. You can see a bunch of the new features, and how to use them(including the Content Aware Fill) for free Here: FREE CS5 TRAINING Presented by Adobe's very own Terry White. If you have or plan on buying CS5 I would recommend this video to you.

That's it for me today folks! Thanks for stopping by, and I hope this helps you with some of your editing.

More TK.....

Jason

Read more on this article...

Tuesday, June 15, 2010

Move your Butt!


Hey everyone! Glad you made it back here to see us at JLykins Photos. I thought today we'd talk about camera angle in relationship to the model/background. I'm going to show you what a little tweak or change in camera angle can do for your photographs. This of course falls under the broader category of COMPOSITION, but today we're going to be really specific about camera angle. Hit the jump to see what I'm talking about...


You want to know a photographers secret? It's a really, really closely guarded one that not many are willing to share(kidding), move your butt! Seriously... If you take all of your images at eye level, as you would normally see the subject, you are limiting yourself to mediocre images. Not to say that there haven't been some wonderful images taken at eye level, but more, many many more have been taken at off or different angles. For example look at these two images below. The first was taken at eye level. The second, was taken on a ladder slightly above the subject. Which do you think looks better?

Img1545

Img1549

Now the model here is by no means fat, but notice how the first image makes her look heavier? See how her chin/neck area looks chubbier? When you have the model looking up at you, it elongates their neck, slimming it. Who doesn't want to look slimmer? Not that Alex(the model here) has one, but if the subject has a double chin, shooting from above them will reduce if not eliminate it.

Here's an example of when getting down low makes all of the difference in the world. Can you imagine if I had taken this shot from eye level looking down at her? The perspective would be changed, the "feeling" of the image would be bland. Getting down low makes sense in this instance because the model is close to the floor, and thus just skimming across the floor gets you what I call the dogs eye view. If you were a pooch running around my studio that day, this is the view you would have had.

JRL_6497-Edit-Edit

Now that's not to say that some images can't be taken from eye level. For example, the image below was taken at eye level. changing my shooting position wouldn't have made a difference. Usually when it comes to tight in headshots like this one, the only thing that could be effected would be the elongation of the neck but in this instance I didn't want to do that.

JRL_6482-Edit-Edit
So there you have it. When shooting images, MOVE! Move your butt up, down, left, right. The more variations you get, the better your chances that you'll have a happy customer and the happier the customer, the better the chances that you'll get repeated business.

See you all soon. Jason
Read more on this article...

Wednesday, June 9, 2010

iPad and what it means to Photographers


Hey everyone! Glad you made your way back to JLykinsphotos. Today I want to tell you a little about the iPad and why we think it's a revenue generating machine for our business. I was assuming that everyone had heard about the iPad up until a few days ago. After all, like any Apple product, it's been hyped, marketed, and talked about for months now. I was wrong. I was at a local restaurant the other day and was asked by guy(not to much older than myself), what the iPad was. When I told him it was an iPad he had no idea what I was talking about. For the purpose of this blog, we're going to assume that everyone that has made it this far, knows what an iPad is, what it does etc. For myself and my partner at my studio, we immediately saw the benefits of it, and how it was going to make us money.

Hit the jump to see how the iPad can produce revenue for you...

At it's core the iPad is a big ass iPod touch with a kick butt display. Photographers have been carrying iPod touches around since there inception as a way of showing off their images to clients. Their mobility and ease of use made them perfect for this. The problem is, the display on the iPod touch is small, and you can't see all of the detail(because it's so small) on the iPod. This is where the iPad shines! The large display is perfect for showing off your images to potential clients. The built in slide show feature allows you to control the slide duration, the type of transition from slide to slide(fade, dissolve, etc.), and allows you to add music from the built in iPod. We made a slide show of wedding examples to show potential clients when we meet them at an off site location for wedding consultations. So far it has been well received by all of our clients. They not only enjoy seeing the images on the large, well lit display, but they appreciate the fact that we are forward thinking enough to have the iPad at all. It gives our clients the feeling that we're always looking for new and better ways of doing things, and that we will bring something fresh to the table. We even added our logo to the slide show at the beginning and end so that it starts and ends with our logo.

IMG_0003

So there's one way that you can make money with the iPad. You can use it to increase the customer experience. The second way that we see this as being able to make us money is in the mobile event photography. We shoot events(class reunions, navy reunions, proms etc.) We provide people with price sheets well before the event, and prefer that people bring cash or check, but even if you spell it out on the price sheets, there is always someone who doesn't read it, or forgot, and all they have is a credit card. We want to be able to accept credit cards anywhere we are. We don't want to be limited to just our studio with a credit card machine attached to the wall. There are many, many "mobile credit card machines" available that basically have a cell phone built into them, but they are expensive. The solution, GO PAYMENT by Inuit. This allows us to accept credit cards anywhere. No more telling clients that you'll send them a paypal request, or "sorry, we don't accept credit cards". You have your iPad ready and punch in their number, or use the optional blue tooth card reader to slide the card. People are more likely to buy, and buy MORE when using a credit card.

So there's two reasons, but that's not all. The next way the iPad has allowed us to make more money isn't necessarily from OUR iPad, but from ALL iPads. To date, Apple has sold 2 million iPads world wide. This is great for you as a business owner, and the owner of a website... as long as you're not using flash. Apple mobile devices don't work with flash. Flash is the fancy code that allows certain types of moving images, certain types of video etc. Because there are so many people that have iPads and even more that have iPhones, if you are using flash on your website, you're cutting out a large chunk of your potential clients. More and more people are accessing the Internet on their phones, and now iPads. If you want this group of people to consider you as a choice for their photographer, you had better have a website that they can view. People don't have patience to wait for slow loading websites, let alone sites that they have to "come back to" on their computers because they wouldn't load on their new fancy iPad. They will just skip to the next photographer who ISN'T using flash, and that they CAN see their content. All of this to say that the purchase of the iPad showed me that when I tried to load our website. I hadn't though about this fact, thus hadn't removed the flash from our site. Now, our site is flash free, opening us up to a larger percentage of the potential clients! It may seem like a small thing, but the small things add up.

There are many more ways to make money with the iPad. You can add it into your wedding package and provide the images to the clients on an iPad for them to keep. You would have to of course figure this price into your package, but it would set you apart from others. I have seen contests where businesses are "giving away" iPads. That is a wonderful way to get potential clients to submit their info to you. We haven't used any of these tactics as of yet, but that's not to say that we won't. There are some great things to come for the photographers and their iPads. In the months to come I suspect that there will be a plethora of apps designed or in some cases redesigned for the iPad. You'd be smart to get on board now, and become familiar with the platform because it's not going anywhere...


More TK.... Jason

IMG_0001

Read more on this article...

Saturday, June 5, 2010

New Processing with CS5!


Hey everyone! As you can see I've been on hiatus for a long time. There were some complaints and I decided to end my blogging. Recently some people have asked me to resume my blogging, and here I am! I do enjoy it that's for sure!

As my first post in a while, I thought I would talk about the biggest news for designers, retouchers, and well, just anyone in photography... Photoshop CS5! Now there are plenty of blogs, tutorials and general how to's to be found on the Internet. If you are new to CS5 do yourself a favor and check out Terry White's FREE 45 minutes of training found HERE. Terry is a Photoshop evangelist, and general promo guy working for Adobe. He has some good stuff on there. Since there is so much good info out there already about CS5 I'm not going to do another "what's new" about CS5, instead I'm going to give you my new workflow, and how CS5 has changed it!

Let's get started! Above you see the final image, but lets take a peek at the before image here:

SR1_6813


As you can see I did my normal stuff. I tweaked the eyes, adjusted color and saturation and did a nice three step portrait action on it. Want to see how to do all of that, and how CS5 makes it easier and faster? Click below, and read on!

As any of you that have read this blog for any amount of time know, I bring my images out of lightroom as part of my workflow. I could do all of these things in Photoshop, but I like the speed of Lightroom for certain things... So to begin with we're going to adjust the Clarity, Tone curve, and bump up the eyes.

With your image open in lightroom, go to the clarity slider and slide it to the positive side. I find that somewhere in the 60's is usually where I set my Clarity. You can see that below.
Clarity

Next we're going to adjust the tone curve. Scroll down to the Tone Curve panel and change from Linear to Medium. Simple as pie.

The last thing we're going to do in Lightroom is the eyes. I have some great brushes that I have downloaded from HERE. From these brushes I've used the Whiten Eyes brush. I'm not going to go into how to use the brushes in Lightroom here. If you want to see all about those brushes refer back to my post HERE on brushes in Lightroom.

Once we're done with all of our Lightroom edits, we're going to take it out to CS5(I know what you're thinking, "bout time" but honestly the Lightroom edits don't take more than a couple of minutes to do. So now we have it out in Photoshop CS5, what do we do first? let me show you!

The first thing we're going to do is set our white, and black points in the image. To do this we need to create a new Threshold layer. To do this click on the threshold icon in the adjustments as shown here: Threshold

This is going to allow you to pick out just the white and black points in the image. To do this you're going to slide the threshold slider to the right until there is just a little white showing. Like shown here:
Threshold 1

Now you should only have small spots of white showing on your screen. To set your color point, select your Color Sampler tool from the left tool bar. To do this right click on the Eye Dropper looking icon and select the one that says Color Sampler Tool. Now locate the small all white area on the image(it will be obvious), zoom in and click one time inside of the white area as shown here:

Threshold 3

Now, you are going to go back to the Threshold control panel and slide the slider to the left until there is just small areas of black showing. Again you're going to click inside of the small black area to set a second point. Once you have set your two points delete the Threshold layer, you don't need it anymore. Now, to take advantage of those two points, you need to create a Levels layer. Go again to the Adjustments panel and click on the Levels icon as shown here:
levels

Once you have done this you want to make sure that you have your Caps Lock on This is so that your cursor will be a precision cross hair instead of the icon(trust me you will want it for the next step). Now that you have the Levels panel open, click on the White Point icon as shown below, and then line up your cross hair with your #1 point as shown in the same image below:

Levels1

Once you have done this, you will see that your image will lighten slightly. Now you're going to click on the Black Point icon(just above your white point icon) and line this cross hair up with your #2 point. You will see a dramatic difference when you click on the second point.

Once you're done with this, we're going to do utilize one of the new features of CS5, the Content aware for the healing brush. The healing brush isn't anything new to Photoshop, but the Content Aware option is new to CS5. What it does, is look at the pixels around what you're drawing over and fills the painted area automatically and quite well. I used to remove fly away hairs, imperfections, etc. in Lightroom because it was easier and faster than using the old healing brush, but now, I use the Healing Brush exclusively. Here's where to find it:

Spot Healing Brush

After I remove any blemishes, fly away hairs, unwanted objects in the image etc. with the healing brush, I run my three step portrait action on the image. I did a whole post on what that action is, and how to create one yourself HERE, basically it creates a nice vignette around the image, also does a bit of sharpening.

That's it for this image. That's all I did! Of course these aren't the only things that are added in CS5 that I use, but these are the things that I used for this image. You can see all of the new things that were added by checking out the link at the top of this post.

I'm interested to hear what you think about CS5, and about how it has changed your workflow in the comments section below. This will again be a regular thing. See you all next time!

More TK Jason
Read more on this article...