Monday, August 30, 2010

Creating a Panoramic With Photoshop CS5


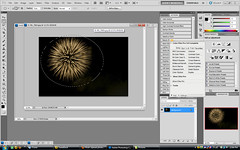
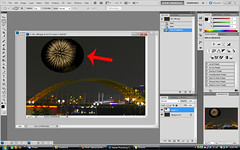
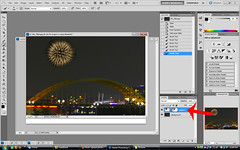
Hey everyone! Glad to see you made it back. Today I want to show you my method for taking a standard image and creating a panoramic using Photoshop CS5's Content Aware Fill feature. It's a pretty simple process that will have you creating panoramas in no time flat! So watch the video, and let me know what you think! Jason

Read more on this article...

Friday, August 20, 2010

Learn to Sharpen in CS5


Hey everyone, thanks for stopping by! Today I wanted to show you a brief tutorial on the Sharpen Tool in Photoshop. The sharpen tool has been around for quite a few versions, but finally in CS5 Adobe has made it usable. They've added what they call the protect detail control. This is a control that preserves the details, and limits the artifacts when sharpening. This improvement has made a tool that was previously unusable, one of my go to sharpening methods. So watch the short video, try the tool out, and tell me what you think! Jason
Read more on this article...

Wednesday, August 18, 2010

Spot Healing Brush with Content Aware Fill


Hey Everyone! Glad to see you here! Today I want to show you another of the wonderful improvements to Photoshop CS5, Content Aware Fill. Specifically where it applies to the Spot Healing Brush. This has been a godsend to Photographers the world over and I use it on almost every image that I take. So watch the video, and let me know what you think. Jason
Read more on this article...

Tuesday, August 17, 2010

Creating a Fireworks image


Hey guys! Glad to see you back! With the upcoming Labor day weekend just around the corner. I wanted to take a little time and explain how to get a really nice fireworks image. It's part Shooting, and part post processing. The image you see above is from last year's WEBN Fireworks show here in Cincinnati. This shot is featured in the United Way Promotion for this year's WEBN fireworks promotion HERE. So hit the jump to see how the shot's were taken and then how they were put together in post.


The key to creating a really good quality fireworks image is the background. Get to your location early. Get a good position that doesn't have anything obstructing your view, and setup your tripod. These things should all be a given to you, but just in case I wanted to spell them out. The next thing is to get a really nice frame of the area without fireworks going off. For the image above, I took several just so I would have quite a few to work with, but here's the one that the image is based on.

JRL_7002

Once the fireworks start, usually the air fills with smoke and the Background starts to look awful. Getting a nice background image is important so we have something to add the actual fireworks to later.

The next thing is to concentrate on the fireworks themselves. I always shoot in manual when shooting fireworks because the camera will see all of the blackness in the background and usually create an exposure way too long for the actual fireworks. Remember the fireworks themselves are very bright so we need to expose accordingly. There is no set exposure to shoot fireworks at, but I generally start around f/5.6 1/125th. See what that looks like and adjust accordingly. It's really a matter of trial and error with fireworks, so play with the settings until you get shots that look nice to you.

So now you're home, the fireworks are over, and you have all of these images of exploding color, and some shots of the background. What now? Open your background(pre firework image) in Photoshop. Start deciding how many fireworks you would like to add to the image. Start to visualize what will look good; what will fill the image with color, but won't be overkill. Now sort through and find the individual fireworks that will fill this frame. For me I chose the following shots:

JRL_7168

JRL_7079

JRL_7065

Now we're going to start by doing a rough selection of the first firework to be added to the frame. You can use whatever method you would like to select the firework. I happened to use the Elliptical Marquee tool for this image.

cutpaste1

Once you have your explosion selected, you are going to copy the selection either by pressing CTRL+C or by clicking EDIT-COPY. Now you are going to select your background layer that is currently devoid of fireworks and paste anywhere in the image by either pressing CTRL+V or clicking EDIT-PASTE. This will create a new layer over the background layer. The new layer will have the single firework that you had selected and copied. You may have to resize your firework to make it fit into the new image. To do this press CTRL+T to open free transform. Grab one of the corners of the transform box with your mouse and drag in until you are satisfied.

Now, once you have resized, you need to mask out the area surrounding the firework that you copied. Chances are the sky will be slightly different in color than the sky of your background(as you can see in this image).

Mask1

You will create a layer mask by clicking the third button from the left of the layers box(it looks like a circle inside of a box). This will create a layer mask for your layer, as shown here:

mask2

Select your brush tool from your toolbar on the left. Make sure your foreground color is white, and start to paint over the offending color right on the image. When you're using a layer mask you are actually paining away the layer almost as if erasing it, but what's really happening is you are just hiding it.

You are going to repeat this process for as many fireworks as you would like to add to your image until it's full. That's all there is to it! Simple enough! You will have a beautiful shot of the fireworks as you saw them, minus the smoke and haze! I hope this helps you get beautiful fireworks shots! See you all next time. Jason

Read more on this article...

Monday, August 16, 2010

Refine Edge in CS5


Hey everyone! Glad to see you made it back. Today I want to show you one of my favorite improvements in Photoshop CS5, the refine edge control. Now the refine edge control isn't new to Photoshop CS5, but there are some great improvements introduced with CS5 that makes it feel like a whole new feature. So watch the video, and let me know what you think! Jason
Read more on this article...