
Good morning all. It's been a couple of weeks since I did back to back posts, but I think I'm going to try to start doing daily posts again. Anyway, today I want to build upon what we learned yesterday, which if you haven't read is making actions. The action I gave you yesterday was just a really basic one so that you could see how actions worked. Today I want to walk you through the steps of probably my most used action, Brighten Eyes. This is the action that gives your photo(especially close ups) that extra pop that draws peoples attention. So lets get right to it.

This is Mya. She's an up and coming model who came to us a few weeks back for some shots. In this first picture you can see that while it's a nice photo, it could use a little more "pop". Her eyes are beautiful so I want to make them the focal point of the photograph. The first thing we need to do is open a new action in the actions panel(if you don't know how to do that read yesterdays post) The next thing we need to do is press CTRL+J (command+J on a Mac) to duplicate the layer. Your screen will look something like this when you do that:
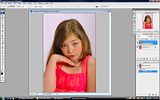
Now, go to the top of the layers box and select screen as the blending mode for this layer. This will make the picture look very light and "blown out" but don't worry we're about to fix that. Now go to the bottom of your layers box and make a new layer mask. You do this by pressing the small grey box with the white dot in the middle of it. Once you have don't this your layer mask will appear next to your thumbnail on your copied layer. Now go to the edit menu, then click fill. A small box will pop up in the middle of the screen and you can select your fill color. The box will look like this:
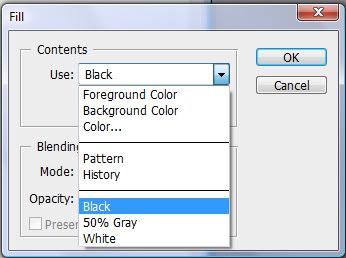
You want to choose BLACK from the drop down menu. Click ok. You picture should look like normal again. If it turns all black you had the thumbnail selected and not the layer mask. If this happens press CTRL+Z then select the layer mask and fill it with black. Once you have done this, your screen should look like this:
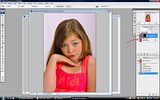
Now go to the foreground color selection panel on the bottom left hand side of your screen. Click the front box and when the color panel comes up click white. Even if the foreground color is already white, click it and reselect white. You do this because we're building an action here so if your foreground color is black and you run the action you want it to select white automatically for you. Now that you have done this select your brush tool on the upper right hand tool bar. I have circled both the foreground color panel and the brush location in red on this picture so you can see where they are:
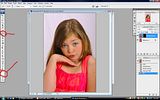
Ok now we're going to make the eyes "pop"! zoom in until the eye fills most of your screen. Go to the top tool bar on photoshop and lower your opacity to 60%. Before you do anything else press stop on the action. This is as far as we can go with the action because now we have to paint the eyes. The action will duplicate the layers and set everything up for you now every time you want to lighten the eyes, and all you have to do is select where to make white. Ok now you can start painting over the whites of the eyes as shown here:
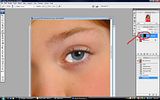
Once you have painted over the whites in both eyes, and the catch light(don't forget to lighten the catch light) zoom back out so that you can see both eyes on your screen no further. Now select your background layer in your layers box. Go to your Elliptical Marquee tool(the circle tool). Make sure that you have the "add to selection" box selected as shown here circled in red:
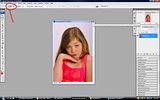
Now draw a circle around both eyes. Go to FILTER-SHARPEN-SMART SHARPEN. Make your amount 175% and your radius around 2. click ok. Now right click your mouse and click DESELECT. Now press CTRL+E to flatten the layers and you can save it as a Jpeg. Here is the before and after shot:

I over whitened just a little bit so that you could really see what we did. I wouldn't normally go quite so bright on them. If you set your opacity to 60% like I talked about above, you should be alright. If not adjust your opacity accordingly. That's all I've got today folks. I hope this helps you. I hope you like it. See you tomorrow. Jason




No comments:
Post a Comment