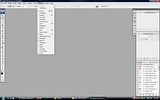
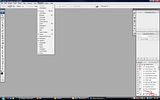
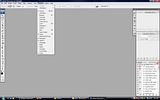
The first thing we need to do is make sure you have the actions panel open so we can work in it. To do this go to the WINDOW tab on the top tool bar and make sure that ACTIONS has a check mark next to it. It should look something like this:

Now that you have the ACTIONS box showing on your screen you're going to need to open a photograph to create and action on. For example, if you want to create an action that re-sizes the photo for you to put it on the web, just open any photo that you'd like to re size. Now, On the bottom of your ACTIONS box click the small icon that looks like a "post it note". It's the second icon from the right. I have circled it in red on the image below:

Now give that new action a name so that you'll remember what it is when you want to use it again. For our example I'm going to name my action "web re size". Now you click "RECORD". This will start the recording of the action. From this point on, anything that you do inside of photoshop will be recorded as a step in the action. Preform whatever task it is that you want to do. In our case I would select IMAGE-IMAGE SIZE then re size the image for the web. To do this you will want to select the largest side(either width or height) and change that number to 800pixels. Make sure that the box that says "constrain proportions" is checked so that the side that you didn't change will automatically change to keep the same proportions on the image. Now you could go to the bottom of the actions box and click the stop button now and have a fully functioning action, but I prefer to take it a step further. I will click save as, select the file that I want to save it in, save it, then click close on the image. At this point I would click the STOP button(first button on the left of the ACTIONS panel, it looks like a square). Now lets test our new action.
Open a new picture, go to the ACTIONS panel and highlight the action we just created and press play(small triangle at the bottom of the ACTIONS box). Your photo should automatically re size, save, and close. If this works you were successful. Now that's one way of replaying the action. Another way is to go to the top of the ACTIONS PANEL. on the right hand side, you will see a small box with three lines in it(pictured below circled in red)

Left click that box. When it opens, at the top you will see the words "button mode". Click those words and make them check marked. This will turn your actions into buttons so that all you have to do is click on them once, and they perform the action.
You can create actions for a lot of stuff in photoshop. If for example you took a series of shots in the same lighting conditions and they all needed a slight color correction, you could record your steps while doing the color corrections on the first photo, then just run the action on all of the rest of them. Pretty cool huh...
Alright, that's enough running of the mouth for me today. Have a good day people. Jason


No comments:
Post a Comment