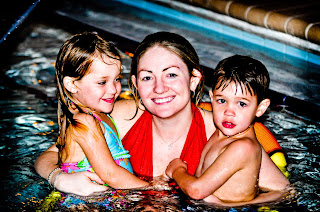
Good morning everyone. Happy Hump Day to you all. I wanted to take a moment today before we get into the article on the Develop module, to tell everyone about a great resource I found last night. Click Here for a complete list of the lightroom keyboard shortcuts. I will talk about some throughout these articles, but it's a great reference. I have it book marked, I like it so much. Alright then, lets get to some (hopefully) interesting stuff.
After you do your sorting in the LIBRARY module, you will undoubtedly want to do some editing and tweaking of the image. Adjust a little here, crop a little there... You know the stuff that you normally would do in Photoshop, or some other image editing software. Well Lightroom has you covered. Lightroom has what's called the DEVELOP module. It is the editing portion of Lightroom, and it's wonderful. You get there by selecting an image in the library module, then either click the develop tab at the top, or just press the D on your keyboard.
Before we start talking about what everything does, and how to use it, lets take a quick trip through the settings so we have the most efficient workflow possible. First right click on the tools box on the right hand side of the screen. It will bring up a box that looks like this:
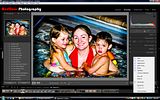
Now as you can see in my box "SOLO" is already selected. If yours is not, go ahead and select it. This makes it so that only one of the tools drop downs can be open at once. So when you click from say basic to tone map, basic closes. Now go to the opposite side of the page where you will see History, and snapshot, along with presets. Do the same thing on that side. Right click and select "SOLO MODE". Now that we've got that out of the way let's move on.
Starting at the top of the tools box we have the crop tool(small square with cross lines in it). The spot removal tool(circle with the arrow on the side). The red eye tool(small circle with even smaller black circle in the middle). The Gradient tool(small rectangle with lines on the outside) and the adjustment brush) If we look below that we have 6 dropdowns. Basic, tone curve, hsl/color/grayscale, split toning, detail, vignettes. Lets start with the crop tool.
Click on the crop tool. When you do you see a small box drop down below it, and on all of the corners of your image you will see a little extra grey border on the outside of the image. These are your crop adjustments. Click and drag any one of those corners or the side outlines and move it inward. Notice the height and width change together to keep the original image ratio. You can "free crop" or crop and change the ratio by clicking on the small lock on the right hand side of the dropdown box that came up when you clicked on the crop tool. Next to that lock you will see a drop down button that says Original. Click on that and you can select a specific size like a 5X7 8X10 etc. Or you can make your own size. Now anyone who is familiar with photoshop will be used to the next trick thing that I'm going to show you.While the corners are selected if you go outside of the image you get the small half moon with the arrows on each end. This is to allow you to straiten the image. For example if you shot a landscape and the horizon line wasn't strait, you would do this, or you could use the next too I'm going to show you. See the small "level" next to the word angle? Select it. Then in your image click on a point on the left where your strait line should start, then while still holding the button, move the mouse to the right and when you get to a point close to the right side of the image where your strait line should end, release the button. Lightroom automatically adjusts the image for you. All you have to do at this point is press the enter key and it will be strait. Pretty slick huh? No more trying to figure out if it's just right, or a little off. Just use the angle tool... If you like the photoshop way of cropping, that is, by clicking somewhere in the image and dragging the box around your selected crop, then you can use the aspect tool. The aspect tool will do exactly that. It will let you crop like you do in photoshop. Of course if you do a crop that you don't like, you can either press CTRL+Z or press the reset at the bottom of the crop box.
Moving on to the spot removal tool. Do you have a small pimple or something else that you want to remove? This tool is the one for the job. click on the small circle with the arrow next to it. This will bring up a circle in place of where your pointer used to be. move this circle over the spot to be removed and adjust the brush size until the brush is slightly large than the spot. You can do this two ways, either by clicking and dragging the size slider in the dropdown menu, or by pressing the left or right bracket keys([ ]). Once you have done this just click on the spot that needs removing. Another small circle will appear and have a line attaching it to the original circle. Move this new circle until you find a proper match for the effected area. Once you've don that, click on the circle in the right hand box, and you're done. Pretty strait forward, pretty easy.
The Red eye tool is next. All you do for the red eye too is click on it like you did with the other two tools. When you do, a pair of cross hairs will come up. Click and drag out the circle that it makes around the effected "red eye" and it removes it. Simple as that. When you're done you click back on the red eye tool and "put the tool back".
The next two tools we're going to skip for the moment and come back to because they are specific detail tools. We need to go over the "global tools" first.
Click on your Basic tab. Lots of things appear, but lets start at the most important, white balance. It used to be(with photoshop at least) that unless you shot in Raw, you were stuck with whatever white balance you had. You could do some hue changes but there wasn't an easy way to select the proper white balance. No more. Whether you're shooting raw or JPEG you can "fix" your white balance with Lightroom. Select the small eye dropper tool on the top right of the box. now move that dropper over your image and select a neutral grey point within the image. Not sure where the neutral grey is, watch the Navigator panel on the left of the screen as you move you dropper over the image. The navigator will give you a preview of what the image will look like when you click on that point. When you find a spot that produces the result that you want just click. That's it. That's all it takes to set your white balance. Again as with the other tools you're going to want to "return the dropper home" before you do anything else. I usually check the image after I have changed the white balance to see if it needs a little tweaking. To tweak, you can drag the Temp and tint sliders to the left or the right to fine tune the color.
Once you have your WB set, you can move on to exposure. Now there are a couple of ways to do this. The first is not the way I do it. The histogram at the top of the menu on the right is "live". What I mean by that is, you can click and drag that histogram to the left or the right and increase or decrease the exposure. The problem with this, at least for me is that it's not very precise. I like to have a little more control over it. That is why I use the exposure slider in the menu. I can click and drag little my little while watching the histogram to ensure that I have the proper exposure. I never ever use the auto button, for anything.
Below the exposure slider you see the recovery slider. This slider is used when you increase the exposure and the image begins to look "washed out". This slider will bring back some of the clipped highlights without effecting the rest of the image.
The fill light slider is used to brighten the shadow highlights. This is very helpful when your shadows are just too dark.
Blacks slider increases the total black point in the image. This is very useful if the shadows just aren't dark enough for you.
Brightness and Contrast sliders work just as they do in photoshop or any other image editing software. I don't prefer to use the contrast as I think it's a pretty "blunt" instrument. Instead I use the tone curve, but we'll get to that later on.
The clarity slider increases midtone contrast in your image. I always increase this. It gives images that extra "punch". An increase to 50 or 60 is not uncommon for me.
The next slider down is the Vibrance slider. This slider is a wonderful addition to the image editing tools. It will increase the colors in the image without increasing the colors that are already saturated. This is really important when working on pictures of people. If you have a person in a bed of flowers and you want to increase the color of the flowers without increasing the color of the skin, use vibrance.
Last but not least in the basic menu is the Saturaton. Anyone that has ever used an image editing software knows what saturation is, and in Lightroom it's no different. Increase the saturation slider to increase the intensity of the colors of the image.
I think that's it for today. Tomorrow I'm going to Finnish the Develop module including the adjustment brush and the gradient tool. Make sure to check back tomorrow for that. See you all tomorrow. Jason



No comments:
Post a Comment