So lets start with settings. This will vary from camera to camera so refer to your camera manual to find the exact menu selection to get to your wireless control. For reference purposes I’m going to be using my Nikon D300 because that’s what I have in front of me. One quick note to the D80 and D90 users, to be able to access your wireless controls you have to first enable view all controls. To do this, go to the setup menu and select the full menu option. After you do this you will be able to select your wireless mode. Ok so the first thing we need to do to get into wireless mode is to go into the menu for flash. This is usually the custom settings menu. On the D300 you enter the custom settings menu and then go into the E selection which is Bracketing and Flash. For those of you shooting the D70, D80, and D90 it will probably look a little different. Once you get into the menu, scroll down to where it says “Flash cntrl for built-in flash”. Press your selection button to the right to enter the flash control menu. Once inside this menu you see 4 options, TTL, Manual, Repeating Flash, and the one we want COMMANDER. Scroll down to commander and press the right selection button again this will get you into the commander menu. In here you will see a menu that looks like this:
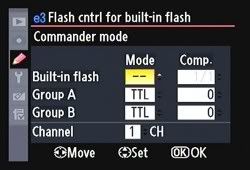
Before I can explain where to set all of these settings let me tell you what they are. Starting from the top, Built in flash has three options, TTL, Manual(represented with a M) and ---. TTL works just like it does normally. The camera will take a light reading and adjust the flash output accordingly. The only difference here is that it will also fire the wireless flash. The Manual or M mode allows you to adjust your output specifically. There are applications for this, but usually I adjust the flash output with the ev compensation and it does the trick. The --- setting means that the on camera flash does not add anything to the exposure. Instead it just does what's called a pre flash and triggers the wireless units. I never use anything but the --- setting for the on camera flash. On camera flash is too harsh and doesn't have enough control for me so I don't bother with it. Now the next menu to the right is the compensation for the flash. If you were using the built in flash to add to the exposure, and lets say you took a test photo and there wasn't enough light coming from the front, you could go to the compensation menu and move it to +0.3 or +0.7 to boost the output from the flash. Back on the left, the next menu down we see is Group A. With the Nikon CLS system you can have up to 3 groups. Group A, group B, and group c. Each group is independent of each other. Lets say you have two groups. Group A we are going to place high on a stand behind an umbrella on the camera right. Group B we are going to place low on a stand behind an umbrella to the camera left. Now you take a test shot and decide that you want to have less flash from the camera left. You go into your menu and select group B. Go to the compensation and move it to -0.3. Now you have dialed down the output from the left, but kept the output from the right the same. This is the reason for having multiple groups. The settings inside of these groups are the same as they were for on camera flash, TTL,M,and ---. The --- for the groups though turns that particular group off. The final menu at the bottom is channel. There are 4 channels available to you. 1-4. These are here in case that you are somewhere that has more than one photographer and they are using the CLS system as well. This allows you to have your own channel, and prevents you from firing someones elses flash by accident. That's it, those are all of the settings that you have to deal with on camera. Pretty easy huh?. I usually keep my stuff on channel 1, group A unless I'm using multiple flashes. I always keep my on camera flash to --- because of the reasons stated earlier. Now lets move on to the flash units.
There are four different flash units that work wirelessly with the Nikon CLS system. They are the SB900, the SB800, the SB600, and the SB-R200. The SB900 is Nikons newest flash unit out and I have only had my hands on one for a few minutes. I can tell you that once you set your channel and group with it, there is just a switch on the back to quickly flip to wireless. Very easy, very fast. The unit I'm going to start with is the SB800. Setup for it is very simple and intuitive. First you have to press the power button (obviously) and turn it on. Then press and hold the center SEL button for three seconds. You will get a screen that looks like this:
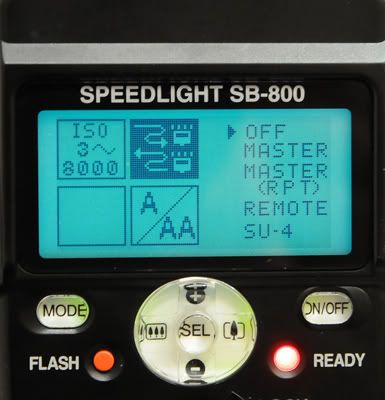
Press the right button on the middle toggle button to highlight the upper right box. Press the SEL button once to move the highlighted selection to the OFF selection in the upper right side of the screen. The first selection available here is OFF. This means that the flash will not be used for wireless, rather it is just for on camera "normal" use. The next option down is MASTER. This is makes the SB800 a master transmitter for use with the CLS system. You would use this setting if you are going to use the SB800 on the camera to trigger other speed lights wirelessly. Users of the D40, D40x, D50, and D70 will use this setting as you don't have wireless built into your cameras. The third selection is MASTER(RPT). This is the selection used when the SB800 is acting as the master flash triggering the other units wirelessly, but also doing repeating flash or high speed sync at the same time. Next we have the REMOTE setting. This is the setting used when the SB800 is the "slave" or is being triggered wirelessly. This requires that you have another SB800, SB900, or camera that has wireless built in triggering the flash. The 5th and final menu is SU-4. This is used when using the SB800 as a MASTER on an older camera not equipped with iTTL. The obvious choice here is going to be REMOTE. highlight the REMOTE option and tap the on/off button quickly. This takes us back to the main screen. We are now able to use this flash wirelessly.
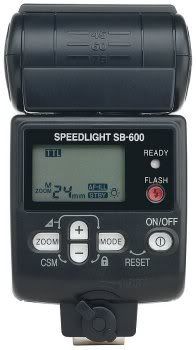
Next lets take a look at the SB600. The setup for the SB600 is slightly different but still not complicated. First we need to turn the unit on by pressing the on/off button for approximately 0.3 seconds. It should look something like this:
Now, press the zoom and - buttons together for roughly 3 seconds. The screen should look like this:
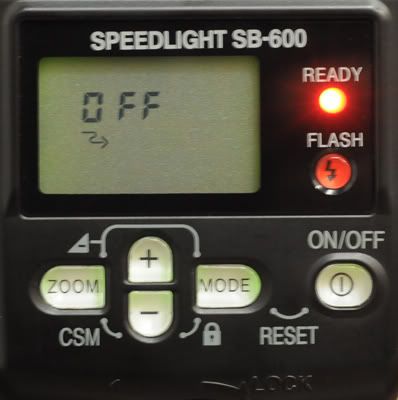
If it doesn't look like that, if instead of the squiggly line it has a picture of a sun or a chime, you just press the + or - button until the squiggly line is showing. Then you press the mode button to change it to ON and it will look like this:
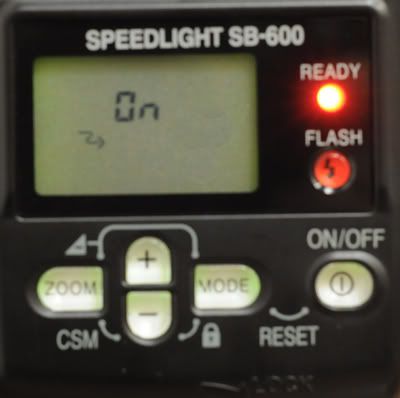
Now from here you press the on/off button once to get back to the main menu. It should look like so:
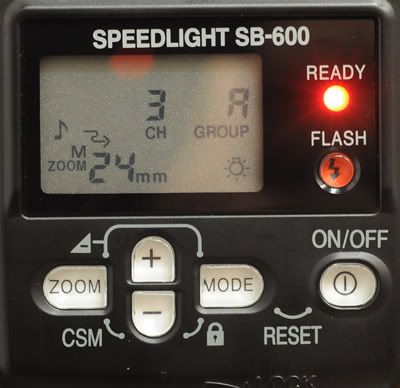
Now that you have done this you can change your channels or groups. The SB600 can only be used as a SLAVE. It cannot be used as a master, even if you have a camera that has built in wireless. And that's it, you're free to move your flash units around as you see fit.
The SB-R200 is purely a wireless Speed light. It has small switches on the outside that makes it very easy to select channel, and group. There isn't really a whole lot to say about this little flash except that it makes a great little "kicker" light to fill in small pockets of shadow.
There you have it. The basics of getting started on the CLS system. Of course like I said earlier we will be going into much greater detail starting next week when we dive into the SB800's advanced settings. Hope this has helped those of you who didn't know how to set your units for wireless. See you all tomorrow. Jason



No comments:
Post a Comment