
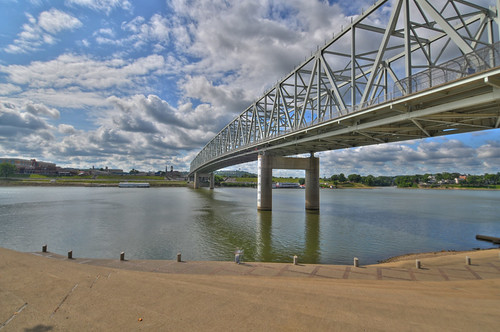
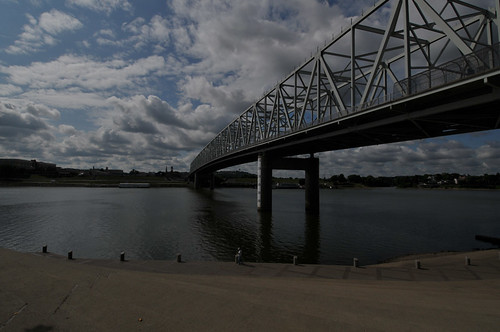
Good morning everyone! Let me Start by Saying that if you attended last Saturdays Photowalk, Thank you! I had a great time, and met a lot of cool new people. If you haven't already checked out the Flickr group you can view it HERE. I can't wait to see what everyone got! I didn't take a whole lot of images because I wanted to spend my time conversing with everyone and thanking them for attending. What I did get was a couple of really cool HDR shots. Here is my favorite:
I'm not normally a big fan of HDR. I feel like it's kind of cheating, but then again some say the same thing about photoshop. For those who don't know, HDR stands for High Dynamic Range. Basically you are taking a group of shots, some over exposed, and some under exposed, and combining them to make one photograph. So here's how you do it...
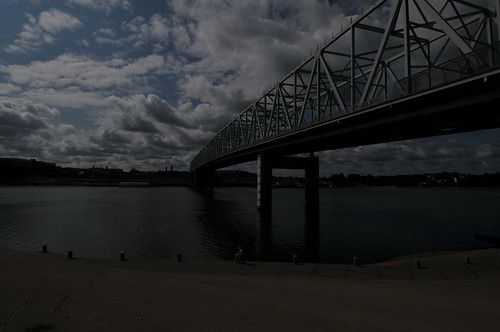
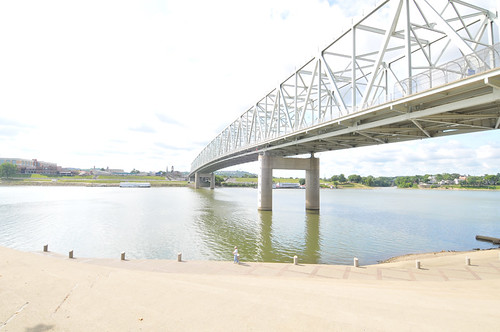
First you have to take the images. Many cameras these days have what's called a bracket function on them. This is a setting that will tell the camera to take a series of photographs and make each one a different exposure. The way to set the camera to do this varies from model to model so refer to your user manual to set the camera to do this. What you get will be a series of images that look something like this:
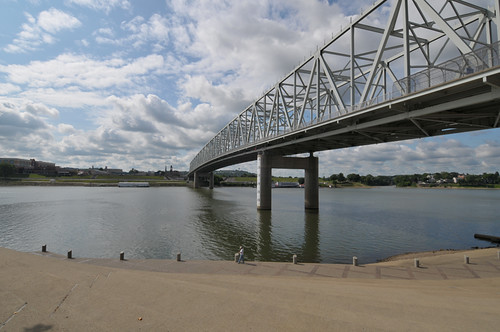
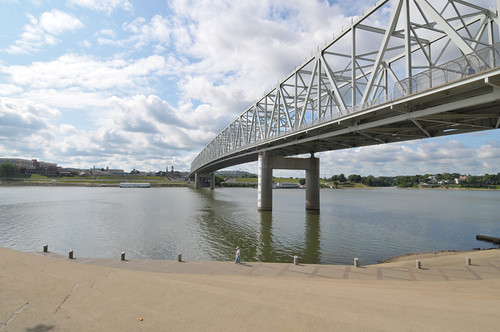
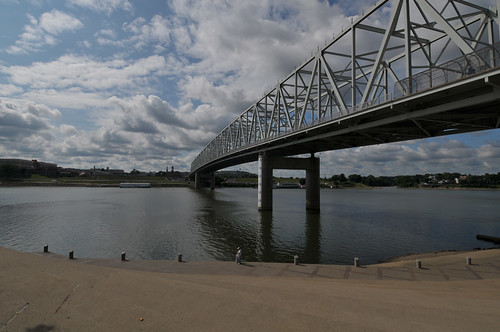
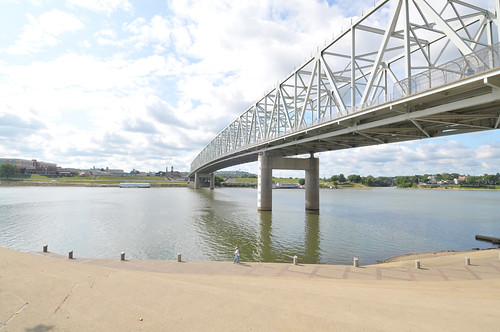
What this does is it captures the entire image from the darkest darks, to the lightest lights. Once you have these images you need to open them into an HDR program. Photoshop does have an HDR feature. You can access this by going to FILE-AUTOMATE-MERGE TO HDR. This works... but not very well. I have found that the best program on the market for creating HDR's is Photomatix Pro. I have photomatix pro 3.0 and I love it. The program is really simple to use, and it does a wonderful job. You can download a free trial of it HERE Here's a quick rundown of how to use it. When you first open the program it will look like this:
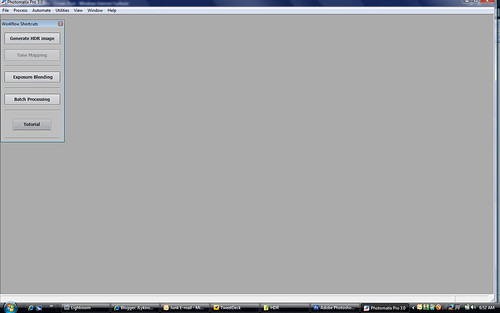
Click on "Generate HDR" in the upper left hand side of the screen. A box will come us that tells you to select your images. Click browse, and then find the images you want to use for the HDR. Click ok, then click ok again when the pop up asks you if you want to create an HDR. At this point a small box will pop up that gives you the option of changing some settings around, I don't, I just click OK. Then it begins to create the HDR. It usually takes a few minutes then it pops up a photograph. That photo doesn't look that great. You have to click on Tone Mapping on the left hand side of the screen and you should get something like this pop up:
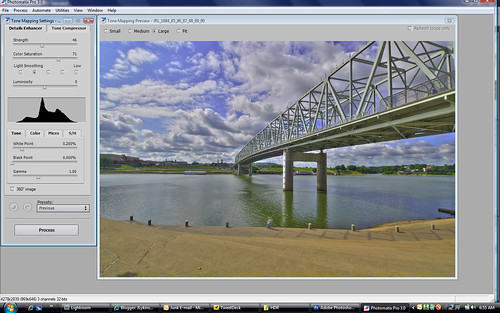
On the left hand side you will see an option called "Light Smoothing". This is basically the level of "HDR" you want. The further left you click, the more it looks like a cartoon. The further right you click, the closer it gets to reality. Once you select your amount, click "Process" at the bottom of the page. This will get you back to the main screen. Once there you can click FILE-SAVE AS to save the newly compiled image.
That's it! That's all there is to an HDR. I hope this helped some of you who had some questions about HDR, and how to shoot, and process it. I have a ton of editing from the weekend to get to, so I'll see you here tomorrow! Jason


Thanks for the rundown of your HDR process. I agree that Photomatix is the best on the market. Shooting HDR is a bit of a cheat, but the images you can create with it are great. I often think that HDR images (when done with an eye towards reality!) capture what I see when I'm shooting much better than a standard image.
ReplyDelete