
Hey everyone! Glad to see you made it back! It's my goal to provide useful, easy to understand content that helps you with your photography. The fact that you're here, reading it, lets me know that I'm doing a good job.
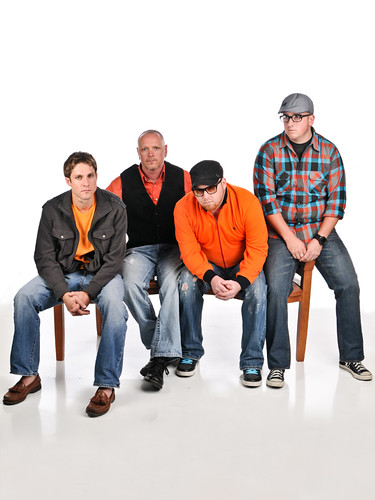
That's Reverse From Zero pictured above. They're a Cincinnati based rock alternative band. They were over the other night for some updated group shots to go with their new EP. These guys are a blast to work with! Fun, outgoing, "willing to try anything" type of guys. They were happy with the outcome, and so were we. I took this opportunity to try out Lightroom 3's new tethered shooting option for the first time in a live situation.(note: I never try out something totally new with a client. I had already played around with the tethering feature just to get the controls down.) Previous to this latest version of Lightroom, we were using Nikon's camera control 2 for our tethering needs. This worked "ok" but was slow, and there were a bunch of steps you had to go through just to get it up and running. Lightroom 3 eliminated those steps, and has made the image playback almost instant. So hit the jump to see how it works, some sample pictures, then some more from our Reverse from Zero shoot...
I don't know about you, but I'm a "freak" when it comes to eye sharpness. When I'm shooting portraits, I want the eyes to be so tac sharp that they're the first thing that you see, and the area of the photo that you keep going back to. That being said, it's a real pain in the butt to use the display on the back of your camera to see if they're really that sharp. Sure you can zoom in, and get a pretty good idea but to really see what it's going to look like you need a large monitor. I prefer something 24inches or larger. When we're shooting in the studio, we have a 24inch monitor hooked to a laptop so we can see the shots as they happen, and then zoom in to certain areas if we want to check sharpness etc. To do this you need a tethering program. For the longest time the only option we had was Nikon's Camera Control 2. With this program you could set your shots to come into the computer, save in a specific folder, then have Lightroom "watch" that folder and automatically import the images into Lightroom etc. It was a process to say the least. With the introduction of Lightroom 3 Adobe has done away with the need to use a third party program and allows you to tether right into your catalog strait from your camera.
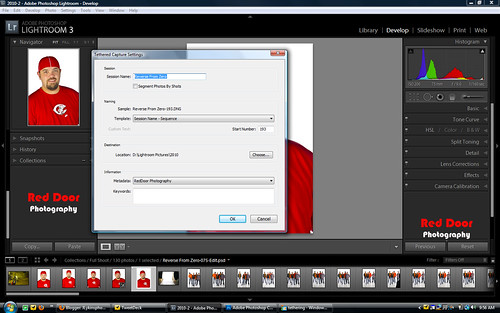
Setting up Lightroom to tether is simple. The first thing you want to do is attach your camera to your computer via a USB cable. Turn your camera on so that the computer recognizes it. Launch Lightroom 3. Once your catalog has loaded go to FILE-TETHERED CAPTURE-START TETHERED CAPTURE. As shown here:

When you click on Start tethered capture, you will get a dialog box asking you for some input. It wants to know what you want to call this shoot. For this particular shoot I named it the band's name "Reverse from Zero". You also have a file naming option. Which I set to Session Name-Sequence. There's the destination to be imported to. I keep all of my images on an external drive, so my location shows that. Then there is the information. Just as in Import, you can add metadata, as well as keywords. Here's a snap shot of that dialog box so you can see what I'm talking about:
Once you fill out this info and click OK, you will get a control bar at the bottom of the screen that looks like this:

This bar shows the basic information coming from your camera. It has your shutter speed, aperture, ISO, and white balance. It also shows the camera model you're shooting with. On the right side of the tool bar you see an option for Develop settings. This allows you to add whatever develop settings you want as the image is brought into Lightroom. For example, if you take the first photo, and you see that you want to give it a little more midtone contrast, you can make your adjustment to your first image, select the develop settings button on the tethering tool bar and select the "Same as previous" option at the top of the flyout window as shown here:

As you can see, there are a whole bunch of options to choose from when it comes to the develop settings. If you want a certain look to be applied to your image immediately when it comes into Lightroom, this is the way to do it.
When you start shooting, you will immediately(especially if you ever used the old method) see how fast the images show up on the screen. I'm using a relatively mediocre laptop(dual core processor, with 3 gigs of ram), and the shots show up almost instantly. If you've never shot tethered, I urge you to try it out. It is one of the best ways to see all of the detail in the images, as well as catch problems while you're shooting and can still fix them, instead of after the shoot when it's too late. So that's it. That's the new tethering option in Lightroom 3 in a nutshell. It's a simple strait forward approach to managing a shoot and making sure that the images are in focus, where you want them to be.
As promised, here are some more shots from the same shoot. Thanks for stopping by, see you next time! Jason


No comments:
Post a Comment