
Hey everyone. we've finally recovered from yesterdays storms. They were working on our electric until almost Midnight... The shot you see above is the product of a new technique that I first saw Dave Cross demonstrate on Photoshop User Tv, although he used it for a different purpose. The whole idea is to create "smart objects" in a template so you can quickly and easily swap out the source photos and have them appear in the pre-made template. We are working on a directory for a local American legion post, so I needed a way to make a template that would allow me to place multiple photos in a grouping and have them constrained to a specific layout. Here's how I did it...
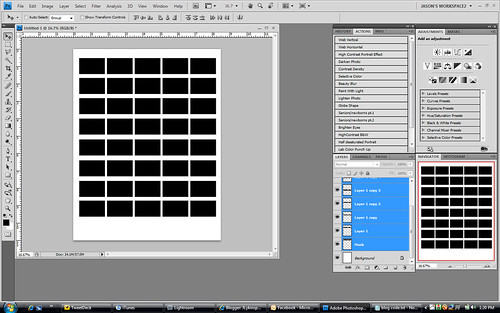
Here is the template that we are attempting to make:
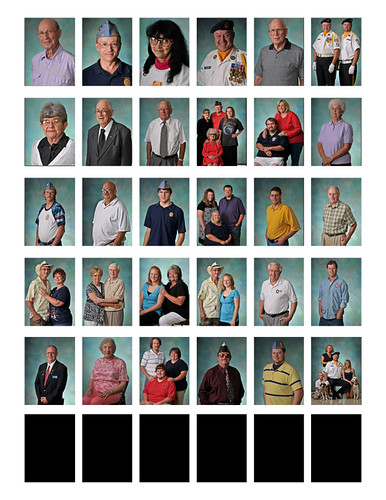
The black boxes at the bottom are just empty spaces that we don't have pictures for yet. Every image in this template can be swapped with another image in about 5 seconds flat without manually resizing the photo once in the image. Here's where we start:
Create a new document in photoshop by going to FILE-NEW. Make the page whatever size it is that you want. For my particular application I needed 8.5X11 inches so that's what I entered into the document. Now go to your layers panel and create a new blank layer by pressing the new layer icon at the bottom of the panel or use the keyboard shortcut CTRL+SHIFT+N. I named my layer MASK(you'll see why in a few minutes) So now we have a document that measures 8.5X11inches with a blank background layer and a blank layer on top of that which I have labeled "mask". It should look like this:
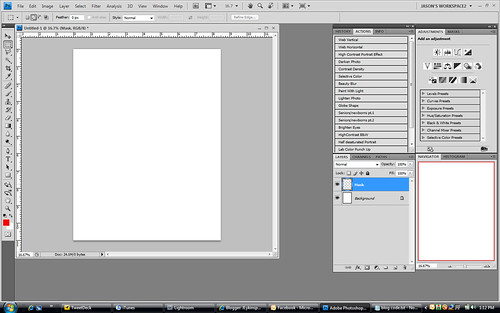
Now grab your RECTANGLE MARQUEE tool and draw a small rectangle in the document, like so:

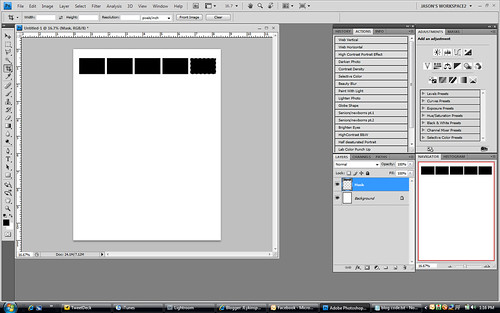
Now as you can see in this image my foreground color is set to red. I want it to be black so press D. This will change the foreground color to black. Now press ALT+BACKSPACE to fill the rectangle with black. Now press CTRL+ALT+T to bring up the free transform around that box. While holding your shift key(this keeps it strait) click and drag the black box your just drew to the right. You will see that you are dragging a copy of it. Drag it until you are satisfied with the distance between the boxes. When you are satisfied release the mouse and the shift key and press ENTER. this will lock your move in, and take it out of FREE TRANSFORM. Now press CTRL+ALT+SHIFT+T. This will copy what you just did and keep the spacing exactly the same. Do this until your document is full of your small black boxes. It will(or should) look like this:
Now, you have a nice row of evenly spaced black boxes, but we want to continue that on down the page so what we have to do is this: Press CTRL+A this will select the entire layer. Press CTRL+J. This will copy your entire layer. Now select your move tool in the upper left hand corner of your screen or just press the letter V. Click on your row of black boxes and start to drag it down. You will see that you are again dragging a copy. Now drag them down until they are properly spaced from the top layer.(Properly according to what you think so there is no right or wrong)
It will start to look like this:
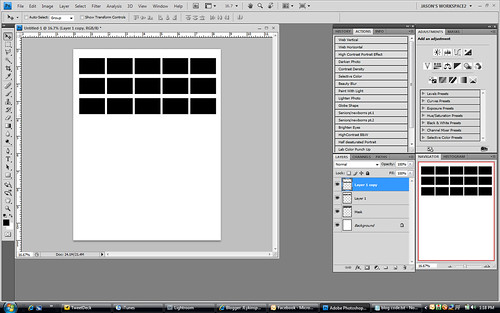
Now keep pressing CTRL+J to copy your layers until you fill the page up. Once you do we need to align the entire set of boxes on the page. To do this hold the CTRL key and click on all of the layers you just made in the layers panel as shown here:
Do not select the background layer, REPEAT DO NOT SELECT THE BACKGROUND LAYER. Once you have all of the layers selected press CTRL+E. This will merge the selected layers. So now you will have two layers, background and layer 1 copy. Now press CTRL and select the background layer. Press V to select your MOVE tool. On the upper menu bar you will see some little icons appear. Press the one that is second from the right, it is the color red in this photo directly under the word WINDOWS:

This will align the black boxes on the background page.
Now select your layer 1. Go to FILE and press PLACE. Select the image that you would like to put in the first box and press ok. Now the image will appear on your screen over your black boxes. It will probably be too large so move it over your first black box. Hold the SHIFT button down and click on one of the free transform handles in a corner of the image. Drag that handle until the image is covering over the black box with a little hanging over the edges. It should look something like this:
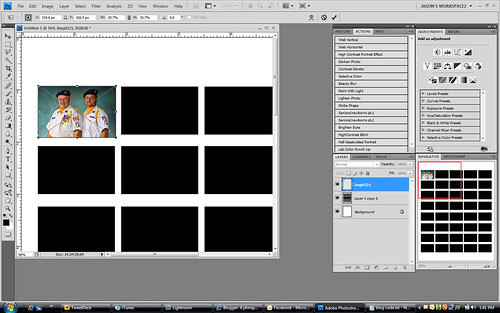
Now with that layer selected still press CTRL+ALT+G. This will create a mask from the black box below the image. It will clip off the parts of the image that are hanging over. Now click on the layer 1 layer again. Repeat the process of going to FILE-PLACE and resizing the images just as you did for the first image. Continue this until your are finished filling the boxes.
Now we're almost done. Actually if you are happy with the images that are in the collection, you are done. If however you want to change any of the images for any reason, just find the layer for the image that you want to replace in the layers Box. Right click on that layer and click REPLACE CONTENTS. You can then select a different image to fill that space. Pretty cool huh?
Save this document as a PSD or photoshop file when you're done with it so that you can come back at any time and use this as a template to just drop your images into by clicking REPLACE CONTENTS. Ok that's all I have for today. It's about time to go home. I'll see you all tomorrow! Jason


Hey thanks so much for posting this, I had been wanting to learn to do this. Some of the stuff I knew but I did learn a lot!
ReplyDeleteThanks again!!