Today I want to talk a little bit about my digital work flow. I can do an entire post on each step(which I will do in the future) but today I just want to lay out the work flow as a reference for you. What is a digital work flow? Well it's the entire process from start to finish of the image. We went through what I do when I get done with the shoot yesterday(backing up) but we didn't talk much about camera settings or what format I shoot, or what I do with the images when I get them into the computer. Today we'll cover that.
Getting it right in the camera is the first thing that has to be done. The old saying garbage in, garbage out is very true. You first have to make sure that your exposure is correct, your composition is good, and the lighting is right. If you do this, you will have a pleasing photo before any post processing, and it will also make editing the photo faster.
What format do I shoot? Raw. We could sit here and talk all day about the pros, and the cons of Raw and Jpeg, but for me Raw gives the most versatility room for adjustment. With the cost of hard drives going down the way they have, it's silly to not shoot Raw. For those who don't know Raw is considered the digital "negative". This means you will have more information in the raw file than in a regular Jpeg file to work with. Also Raw files are "lossless". What is lossless? Lossless means that every time you open and close the photo, you will not be compressing it. That means that your picture quality will not fade with time. With Jpeg each time you open and close the file, it gets compressed and a few bits get chopped off. If you open and close the file enough times, you will start to see the photo quality degrade. This doesn't happen with Raw files.
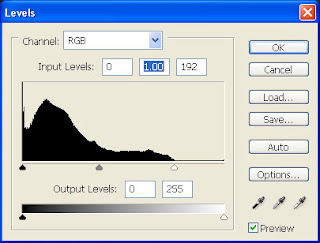
OK, so now we're shooting Raw. We get done at the end of the day, do our backup(as discussed yesterday). Now what? well I start out in Adobe Bridge. Photoshop Bridge allows you to view your Raw files quickly and select which ones to edit. So now I've selected an image that I like, I double click and it opens in Photoshop. The very first thing I do is a levels adjustment(as seen in the photo at the top of this post). This adjustment sets your whites and your blacks in your image. I think that before you can make any more adjustments in your photos, you have to have a solid starting point which means correct blacks and whites.(I'll do a post later all about levels, and how to make this adjustment). Once we have the levels done, I like to take a look at the contrast in the photo. The contrast is the difference between darks and lights. To do this I open a new curves adjustment layer. The box will look something like this:
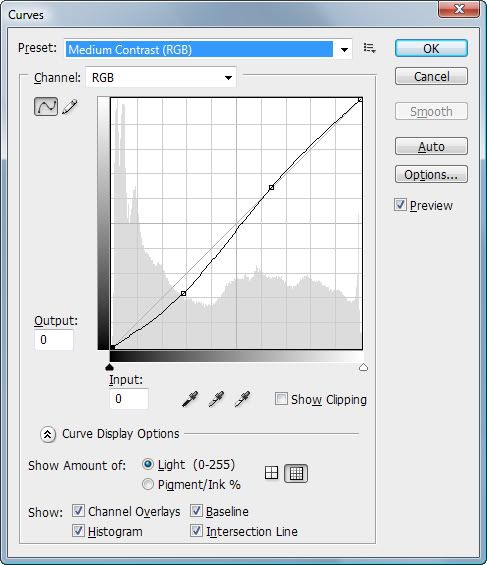
I make my adjustments in curves(again I will do an entire post on adjusting curves later) until I'm happy and save it.
After I've made my adjustments above, I generally scan the image for any areas that may need specific touch ups. I may remove a blemish, or adjust a color cast but for the most part I'm done except for sharpening. Always do your sharpening last.
Once all adjustments are done, I save the file as a Jpeg, and as a TIFF in two separate folders, and move on to the next photo. All of these things take me roughly 60 to 80 seconds to do. The more you practice these techniques the faster you will become at doing them. The addition of "actions" will make this process even faster. I will go into more detail about actions tomorrow. In fact that's what tomorrows entire post will be about. See you then. Jason



No comments:
Post a Comment