Thursday, August 27, 2009

News and some new products!


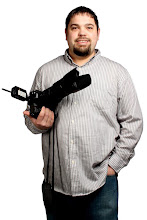
I love food... As if you couldn't tell that by looking at me... When they brought this to me at the wedding last weekend, it looked soo good I had to take a photo of it. This folks is the REAL reason I'm a wedding photographer, the free food! :~) In all seriousness, the folks at the BrookSide country club did a wonderful job of taking care of us while we were there. Thanks!

On to a little bit O' news....


The Nikon D700 has been listed as Discontinued at Best Buy... I got word this morning(in the form of an email) that there will be a new D700s available soon. Like the D300, it will have dual slots, and video capability. We'll see if it is true in the weeks to come.

According to a friend at Best Buy, the D300s will be available starting today(body only). If you've been holding out, or you just have to have the newest thing, get there today when the doors open at 10AM.

CNN reported this morning that Microsoft appologized for swapping the head of a black man for the head of a white man in an ad being distributed in Poland. If you want to see the before and after shots click HERE. Funny stuff.

If you haven't had a reason to get an Iphone up to this point, THIS is the tipping point. I am seriously considering getting an Iphone just for this app...(kidding) I would however appreciate it if someone would send a little note to the Chipotle people and tell them not to forget about us Blackberry users... I mean I want to order a burrito from my Storm too...

Last but not least, I told you all about a photo contest a couple of weeks ago over at

Kelby's Blog, where one lucky winner was going to get a plane ride to Florida, and shoot a FSU Game... Well the Tools over at Sports Shooter made such a stink about it, that FSU took back the field pass. I (along with many others) wrote a letter to the FSU athletic director expressing my displeasure. Don't know if it will do any good, but at least I tried.

That's all I've got for the day. Talk to you later. Jason
Read more on this article...

Wednesday, August 26, 2009

Making small flash big


I love this picture! It's my attempt to create an interesting reception photo by changing the viewers perspective, and do something a little different. I'd like to be able to tell you that I took this photo, but I'm not sure. You see to get this angle, I had my camera on a monopod extended all of the way out. There was a SB900 flash on top and a 12-24 wide angle on the camera. Triggering it all was done with a Pocket wizard. I was holding the mono pod up in the air above the group, and Shad was firing it from across the room with a pocket wizard... So I didn't actually press the button on the pocket wizard, but my idea, my composition...

Sorry I've been on hiatus the first half of this week. I was working on updating our website. It needed a face lift. I think it's getting there. I'm working on adding a blog to it now which should be active in a few days. Check it out by clicking Here. Many people have told me that they appreciate the posts about small flash and things that go along with it so I thought that today I would talk a little about some of the modifiers that we use.

Where to start, whew boy there are so many different types of modifiers available to the photographer that it's hard to know what to talk about first. Lets start closest to the flash unit itself. The domed diffuser or the small Tupperware piece of plastic that fits atop the flash unit is where my diffusion usually starts. This little piece of plastic is a semi transparent piece that spreads the light from the flash as soon as it leaves the flash head. It does a wonderful job of scattering the light right at the beginning of the lights journey. Anytime that I am looking for soft light, even if I'm using another modifier, I leave the domes on. In this game of flash, I want as much diffusion and soft light as I can get so I leave it on. A couple of things to note though, first putting this diffuser on will drop your available power by at least 1 stop. That's a given though. Anytime you diffuse or place a softener whether it be a domed diffuser, softbox, or an umbrella in from of a light source, it will loose it's potential power. With the high ISO's available to us now, I don't worry too much about it. I would rather have a soft beautiful quality of light with a little less power than a super powerful harsh light source that has absolutely zero quality to it. The second thing to note about these domed diffusers is that when they are attached to the flash head, the flash is zoomed to it's widest angle possible. This only applies to the SB800's and the SB900's. All of you folks working with the SB600's and have the sto-fen aftermarket diffuser, you don't have to worry about it. Some guys will notch out their domes where it makes contact with the little switch on the flash head so that they can zoom the flash while leaving the dome on.

A little further out from the domed diffuser you have a huge selection of modifiers. There are no less than 100 different major manufacturers producing all sort of modifiers, not to mention the knock off versions. I can't possibly tell you about all that there are out there, so I'm going to just give you a rundown of what I use. My diffusion system starts with
David Honl. The Honl system is comprised of multiple pieces of modifiers that work seamlessly together.


Photobucket

At the core of this system is the speed strap. It is a piece of Velcro that has a non slip material on the side that comes in contact with the flash. The strap gets wrapped around the flash head and secures to itself. Once you have this in place you can attach any of the accessories easily and quickly. Probably the most used piece in the collection is the the speed gobo. It has a white side and a black side to it. The gobo can be attached and used as a bounce card, or as a gobo. You can attach two of them and use them as barn doors. They are very versatile. The next pieces that I use from the set are the snoots. They come in two different versions, the 5inch and the 8inch. They work very well, and fold down flat for storage. The next piece that I use is the Speed Grid. The Speed Grid is a honeycomb shaped piece that is placed on the end of the flash and it directs the light in a more linear fashion. Great for a hair light, or when you want to spotlight just an individual. There is also a gel kit that is offered from Honl, but I still have a ton of gels left the I cut down myself. Maybe when those gels wear out, I'll order the ones from Honl.

The next modifier that in our arsenal is the Gary Fong Lightsphere. This little Tupperware looking unit is amazing. Most every wedding photographers that I know, uses this unit at some time during a wedding. Usually at the getting ready stage, and at the reception where things are happening fast that you don't want to miss. The unit itself is a dome that reflects the light in all directions allowing you to move from vertical to horizontal quickly without changing the flash orientation as with a stroboframe. Handy piece of equipment that I suggest for anyone doing events, or weddings.

On to the larger units. Shoot through umbrellas are the tried and true units for small flash photographers. If you want to soften the light and don't care where it scatters to, get an umbrella. They are cheap, and can be found at any camera store worth their weight.

Lastolite has two products that I really have been enjoying using lately. First the Tri-grip is a diffuser/reflector that is roughly triangle in shape with a sturdy handle at it's base. These units are easy to hold and manage with one hand and work great as either a reflector, or a shoot through diffuser. They are large so your flash becomes as large as the diffuser when firing through it. The second product I've been using lately is the Lastolite Softbox. This is a smaller softbox designed to be mounted on a monopod, or a light stand and have a small flash run through it. The quality of light coming from these two different modifiers is wonderful.

So that's it. That's the major collection of modifiers that we carry with us. Of course we have the standard round reflectors that most photographers carry. They work well, I have just fallen in love with the Trigrip so that's the unit of choice for me right now.

Alright, gotta run. Hopefully I'll see you all here again tomorrow. Jason
Read more on this article...

Thursday, August 20, 2009

Some new stuff....


Isn't she beautiful? Can you believe she's only 3!? She's growing up soo fast that her mom and I are doing everything we can to keep her "young". Anyway you don't come here to read about my family : ) That shot was taken as a "test" shot to check lighting ratio's at my studio. It turned out to be the best photo that I've ever taken of her, go figure.... It's amazing how a great photo will turn up when you least expect it. You can spend hour or days planning a shot, get what you think is the shot of a lifetime and everyone else just shrugs their shoulders, then take a quickly composed, spur of the moment shot and everyone hails it as your best shot ever. It's crazy this thing we call photography. So on to some new products and news....


Drobo has a new(new to me anyway) business unit to go along with their traditional unit. The also have a rack mounted unit for server racks. If you are in need of easy to use backup hardware, Drobo is for you.

Midwest Photo Exchange has the new Elinchrom Ranger battery in stock. They don't have them online yet but I was talking to a friend there yesterday and he confirmed that they have the 1 head kits in stock for $1500.00. This may sound like a lot, but when you consider that these units have 400watt/second rating and are the size of a SB800, you'll see the value.

There is a contest going on to win a free ticket to photoshop world in Las Vegas! over at NAPP News. The contest ends tomorrow(Friday) so if you want a shot at it, better get over there. I entered my submission for the contest, so good luck! ; )

Terry White has a pretty good review of the Lastolite "Uplite". Click to read all about this great little product that is sure to make your life easier.


That's all I've got today. Busy day today. I'm working on a project that may lead to quite a few orders. See you all tomorrow! Jason
Read more on this article...

Tuesday, August 18, 2009

HighSpeed FP blessings and curses...


Hey Everyone. Glad to see you back. Lots going on at the studio these days. Wedding season is in full swing so that yields a shoot every Saturday, along with a couple of thousand images a week to edit. Along with the weddings we have multiple projects going on at once, as well as the normal portrait work. To say we're busy would be an understatement, so if I miss a day or three on here, please bear with me and keep checking back for more content. I didn't forget about anyone, I promise. The shot you are looking at is from a wedding we did at the Aston country club. It's a beautiful golf course, and banquet facility, that can accommodate 300+ people. The shot was taken outside of the Downstairs facility next to the beautiful stone work they have there. It was a wonderful setting for a wedding. Also as you can see our bride was beautiful and photogenic so it made our day that much more enjoyable. However the day didn't go without any hiccups. We have been playing around with Auto FP mode lately and it almost bit us in the butt. For those who don't know Auto FP stands for Auto High Speed Focal Plane mode. Never heard of it? Read on...


Auto FP or Focal Plane mode is a mode that allows you to sync your flash at up to 1/8000th of a second. This is great for working in bright light where you want to blur the background with a lower aperture or f/stop. Before we get into how it does that lets take a look at how a normal flash sync works.

The maximum flash sync speed of a camera is the fastest shutter speed that can be obtained while still firing a flash. Most cameras sync speed is between 1/125 and 1/250(reference your manual to find out for your models sync speed). What this means is 1/250th is the maximum period that the shutter will be fully opened so that it can register the entire flash. If you go above that you will start to get a dark line on either the top or the bottom of your image because the shutter was closing as the flash fired. Now if you're inside, or under an overcast sky, this isn't a problem. You can still have your aperture set at f/2.8 and be below your sync speed, but if it's a sunny day(like we had Saturday for this wedding) your shutter speed will increase beyond what the camera can sync at. So how do you still blur the background? Highspeed FP.

Highspeed FP or Focal Plane mode will allow you to sync your flash up to 1/8000 of a second and blur the background. It does this not by increasing it's output, but rather making a series of short flashes throughout the entire shutter cycle. The trade off is power. You have to be extremely close with the flash when you are using FP mode. It's almost a necessity that you have the flash off camera and close to the subject. For this photo:

_SR19721

The flash was just out of the frame literally 6 inches from her face. If it hadn't been that close, there wouldn't have been enough light output to illuminate her face and it would have been underexposed. Notice the nice creamy bokeh in the background? That was possible because of Auto FP. I'll explain. The settings for this shot were ISO200 f/4.0 at 1/800th of a second. Now if he hadn't been in FP mode when he took this image, and he tried to us f/4.0(to blur the background) the camera would have said HI. This means that the maximum flash sync speed(1/250 normally) wouldn't be fast enough, and the photo would have been over exposed. With FP mode he was able to take the picture at 1/800th and get the proper exposure while still using a flash to light the bride.

So auto FP sounds great right? I mean you can shoot faster shutter speeds and lower aperture while still using flash. It's great when you use it on purpose. The Nikon D300's and D700's that we use have a setting in the menu to adjust the maximum flash sync speed. You can have all of the way up to 1/250, but then there's a little option that says 1/250*. The little star means that you're in Auto FP mode. This means that as long as you're shooting at 1/250 or lower the flash will function normally. If however you go above that the camera will automatically switch to FP mode. We shoot in aperture priority mode which means that we select the aperture we want(because we like to control the depth of field) and the camera sets the shutter speed for us. This is bad in Auto FP mode. What happens is you set your aperture for the desired depth of field, and the camera will adjust the shutter speed. Sometimes that depth of field requires a shutter speed higher than 1/250 to make a proper exposure. When that happens, the camera automatically switches to Auto FP, and cuts your flash output dramatically. You have to keep an eye on your shutter speed when in this mode, otherwise you will end up with severely underexposed images. This happened to us on Saturday. Luckily we caught it quickly and corrected the problem by taking the camera out of Auto FP mode.

So to recap, Auto FP is awesome! Just make sure you keep an eye on your light/subject distance, and your shutter speed. Before I go, one more great image from Saturday:

_SR20406

Image by Shad Ramsey/RedDoor Photography All post processing by Me. Have a great day guys! Jason
Read more on this article...

Monday, August 17, 2009

Light up the room


Welcome back everyone! Glad to have that brutal weekend behind me. We shot an outside wedding in 90+ degree weather. As always we wore all black, which didn't help things. We were there until 11 or 12 Saturday night, then back up and to the American Legion for a second round of directory photos by 7AM... Somewhere in between all of this madness I found time to work on a self project for The Strobist. Above is the end result. The whole idea behind the project was to photograph an architectural space in your house. The idea came from all of the houses for sale on the market these days. What is going to separate your house from the millions of others that are up for sale? When people are browsing houses online looking for their next home, what's going to make them stop and take a second look at your house instead of skipping over it like the 20 previous? Good photos. If you make your home look warm and inviting in the photos in the online ad, then you have a better chance of people taking a closer look. So read on for how to accomplish a photo like this...

I decided that the cleanest lines I could find in my house to demonstrate this type of shooting were in my twins room. The whole idea is to light the room nicely without being able to see the flash units. It takes some ingenuity and a couple of well placed clamps to make that happen, but here's how I did it.

The first thing I like to do when setting up a shot like this is to figure out the camera position. That's the most important thing. Figure out what the composition is going to be, then build the lighting around that. I started in the middle of the one wall. You can see here:
JRL_4825

I just pressed the shutter button and took a look at what came out. This gives you the ambient light picture as shown above. An accurate representation of the scene to be sure, but we want a little more out of it. Everything seems too Asymmetrical. I didn't like it, lets move to the doorway and shoot from there.

JRL_4842

Again, it was alright, but the main thing that I didn't like was the glaring highlight from the photo on the wall. In the end I chose the right corner under the window. So that's step one, figuring out where to place yourself in the room to get the best shot.

Next is to figure out how to light that room. Nice even FLAT lighting is just that, nice even and flat. I didn't want that. I wanted to create some contrasts in the room to make it look a little more appealing. The first step for me was to get the window into play. There was an abundance of light coming from the sky outside, but unfortunately it was boring empty 2 in the afternoon sky. Even when I tilted the blinds to create a shadow on the wall it was boring. There was no shadow because this window never gets direct sunlight. It is just getting that great big even softbox type light coming from the sky. Great for portraits, bad for crating hard edged shadows like I was looking for. So what to do? Make your own sun.. In this photo:
JRL_4911

you can see that I placed a flash on a magic arm out the window of the next room over. It is zoomed to 200mm and has two full cuts of CTO warming gel on it. You can also see in the photo that there is a pocket wizard triggering the flash. Now if you are in a lower room, you don't need to clamp the flash to a magic arm, you can just place it on a stand outside of the window, but since I was on the second floor I had to do it like this. You can see in the main photo above that the results are dramatic. There is a nice contrasty shadow of the blinds on the wall just above the bed on the right.

Next I wanted to light the bed on the left a little bit because the bed on the right was getting a lot of extra light from the window light. I put a GRID on an SB800 with one full cut of .CTO Warming gel on it, and hand held it above my head to the camera left. It was pointed towards the bed and large bookcase to the left. Next I wanted to highlight my wife's wonderful art that she free handed above the bed, so I placed another SB800 to the Camera right with an Eight inch snoot pointed directly at the painting. After a little adjustment I got it positioned correctly to just put an oval of light around the name.

Here is a look at where I was sitting as well as the two flash units I was using to light the room:

JRL_4910

The flash attached to the window ledge is the one that I was holding over head. I just clamped it there for this setup shot. So that's it. That's all there is to taking a nice photo of an interior room of your house. Hopefully some of you can take this idea an run with it. Hopefully some of you will be able to either sell your house faster, or help a friend sell their house faster. All because of some nice photos taken by you.


So that's it for me today. I've got over 2000 images to get edited. See you all tomorrow! Jason
Read more on this article...

Monday, August 10, 2009

Keywords get under my skin


Keywords get under my skin. They are so perfect but such a pain in the ass. Anyone that is using Lightroom knows that you can keyword your images for easy distinction and sorting later on. You can keyword your files individually, or you can do batch keywording. You can have Lightroom do it as they're being imported so that every file coming in gets that particular "tag". But what's the rub? What's the catch, and what bothers us about keywording so bad that most of us rarely use the feature? I'll tell you what I think... I think most of us don't use keywording because it's a pain in the neck. Sure we can batch keyword like I said above, but to truly make use of this feature, we have to give individual images keywords. Not just "family photos" or "Smith wedding". We have to go in and select a group of shots within that folder that get not only "Smith wedding", "wedding", "bride", "groom", etc. But they also get "formals" or "Candis", or "ceremony"... To truly use this great image database we have called Lightroom, we have to get very fine and precise about our keywording. If not, why bother. Why bother at all if we don't have them correctly keyworded. If we can't go to the search bar and type in "food photos" or "wedding formals" and have a list of all of the images we've done show up, we're wasting our time. To be quite honest, I don't do that half of the time either. I don't keyword most of the time, because I've got way too many other photos to upload. I'd never be able to get the rest of the images edited. I'd spend all of my time organizing and not enough time editing. Anther thing that bothers me about keywording, well Lighrooms "keyword as you import" feature to be exact, is that sometimes I forget to remove those keywords from the keyword box and all of my images that get imported after that get the wrong keywords. An engagement shoot will end up with the keywords "United Way Executives" or something like that. It's a really bothersome problem. I complain, but I don't have a solution for the problem. In theory the keywords work. You label an image with a "tag" or "keyword" and that's it, but sometimes the most well thought out plans don't work out right...

Thinking of getting into Microstock? Check this guy out:


That folks is your competition in the microstock field. He has 2000 of his images a day downloaded... 2000 a day! I don't know about you, but I can't compete with that.

Ok, that's all I've got. It's Monday, I'm super tired, and staring at this screen isn't helping in that department. See you all tomorrow. Jason
Read more on this article...

Wednesday, August 5, 2009

Make your objects Smart


Hey everyone. we've finally recovered from yesterdays storms. They were working on our electric until almost Midnight... The shot you see above is the product of a new technique that I first saw Dave Cross demonstrate on Photoshop User Tv, although he used it for a different purpose. The whole idea is to create "smart objects" in a template so you can quickly and easily swap out the source photos and have them appear in the pre-made template. We are working on a directory for a local American legion post, so I needed a way to make a template that would allow me to place multiple photos in a grouping and have them constrained to a specific layout. Here's how I did it...


Here is the template that we are attempting to make:

directory

The black boxes at the bottom are just empty spaces that we don't have pictures for yet. Every image in this template can be swapped with another image in about 5 seconds flat without manually resizing the photo once in the image. Here's where we start:

Create a new document in photoshop by going to FILE-NEW. Make the page whatever size it is that you want. For my particular application I needed 8.5X11 inches so that's what I entered into the document. Now go to your layers panel and create a new blank layer by pressing the new layer icon at the bottom of the panel or use the keyboard shortcut CTRL+SHIFT+N. I named my layer MASK(you'll see why in a few minutes) So now we have a document that measures 8.5X11inches with a blank background layer and a blank layer on top of that which I have labeled "mask". It should look like this:

Untitled-2

Now grab your RECTANGLE MARQUEE tool and draw a small rectangle in the document, like so:

smart2

Now as you can see in this image my foreground color is set to red. I want it to be black so press D. This will change the foreground color to black. Now press ALT+BACKSPACE to fill the rectangle with black. Now press CTRL+ALT+T to bring up the free transform around that box. While holding your shift key(this keeps it strait) click and drag the black box your just drew to the right. You will see that you are dragging a copy of it. Drag it until you are satisfied with the distance between the boxes. When you are satisfied release the mouse and the shift key and press ENTER. this will lock your move in, and take it out of FREE TRANSFORM. Now press CTRL+ALT+SHIFT+T. This will copy what you just did and keep the spacing exactly the same. Do this until your document is full of your small black boxes. It will(or should) look like this:

smart3

Now, you have a nice row of evenly spaced black boxes, but we want to continue that on down the page so what we have to do is this: Press CTRL+A this will select the entire layer. Press CTRL+J. This will copy your entire layer. Now select your move tool in the upper left hand corner of your screen or just press the letter V. Click on your row of black boxes and start to drag it down. You will see that you are again dragging a copy. Now drag them down until they are properly spaced from the top layer.(Properly according to what you think so there is no right or wrong)

It will start to look like this:

smart4

Now keep pressing CTRL+J to copy your layers until you fill the page up. Once you do we need to align the entire set of boxes on the page. To do this hold the CTRL key and click on all of the layers you just made in the layers panel as shown here:

smart5

Do not select the background layer, REPEAT DO NOT SELECT THE BACKGROUND LAYER. Once you have all of the layers selected press CTRL+E. This will merge the selected layers. So now you will have two layers, background and layer 1 copy. Now press CTRL and select the background layer. Press V to select your MOVE tool. On the upper menu bar you will see some little icons appear. Press the one that is second from the right, it is the color red in this photo directly under the word WINDOWS:

smart6

This will align the black boxes on the background page.

Now select your layer 1. Go to FILE and press PLACE. Select the image that you would like to put in the first box and press ok. Now the image will appear on your screen over your black boxes. It will probably be too large so move it over your first black box. Hold the SHIFT button down and click on one of the free transform handles in a corner of the image. Drag that handle until the image is covering over the black box with a little hanging over the edges. It should look something like this:

smart7

Now with that layer selected still press CTRL+ALT+G. This will create a mask from the black box below the image. It will clip off the parts of the image that are hanging over. Now click on the layer 1 layer again. Repeat the process of going to FILE-PLACE and resizing the images just as you did for the first image. Continue this until your are finished filling the boxes.

Now we're almost done. Actually if you are happy with the images that are in the collection, you are done. If however you want to change any of the images for any reason, just find the layer for the image that you want to replace in the layers Box. Right click on that layer and click REPLACE CONTENTS. You can then select a different image to fill that space. Pretty cool huh?

Save this document as a PSD or photoshop file when you're done with it so that you can come back at any time and use this as a template to just drop your images into by clicking REPLACE CONTENTS. Ok that's all I have for today. It's about time to go home. I'll see you all tomorrow! Jason
Read more on this article...

Tuesday, August 4, 2009

New Format


I couldn't help it... I was going through my Lightroom catalog looking for a nice photo to post today and I ran across this one. When we setup for a shoot we have to test the lighting. One of us has to stand in and play the "model". He should have known this was going to end up on the web... : ) So today is the first day with the new format. It's going to allow for a lot easier searching for particular articles. You'll see the first paragraph then click on read more to, well read more. This will make a big difference when it comes to the longer tutorial posts. So on to more exciting things that you actually care about!

Nikon just released a new line of point and shoot cameras that have built in projectors. They are supposedly able to project an image up to 8x10 on a wall/surface. Doesn't sound very exciting to me, but if you want to check them out click Here

I found a great site with tons of Lightroom video tutorials that are all free. The Digital Photography Connection offers free Lightroom video tutorials in a step by step manner that are easy to follow along with. Great stuff go check them out.

Also go to The Photoshop Insider to check out the new contest they have going on over there. They are offering a chance to shoot alongside Scott and Mike Olivella on the 50 yard line of a FSU game! Only amatuers are elligable so get over there and enter.

Well I have to cut it short today folks. Power went out and my battery is running low on my laptop. See you all tomorrow! Jason
Read more on this article...

Monday, August 3, 2009

Test


This is a test to see if this new coding I have been doing tonight will work.
The idea is that I will include a paragraph under the photo, then you will be able to click in and read the entire blog post. This will help with the tutorial posts because they seem to run on forever and take up the entire page. I hope you all enjoy this new format better. Jason Read more on this article...

Back to the Basics...


I love my job. Well not my normal full time job, but my second full time job. I mean as a photographer (specifically a wedding photographer) I get to spend time with couples that are genuinely in a good mood. They're happy to see me, and we have a lot of fun together. That is exactly what the atmosphere was like for the engagement session you see above. We all were having a good time. We took a ton of photos(like we always do) but this was one of my favorites because I love the wide angle so much.

Another that I really really like is this one:

_SR19011


This was taken by Shad under the pavilion at the top of the hill at Ault Park. What I really like about this image is how nice and soft the background is with the beautiful bokeh but the foreground and the couple are tac sharp. This is due to the wonderful construction of the Nikon 85mm f/1.4. Some (Tom Bryan) call it the "magic lens". I like to think of it not as magic, but rather a quality well made lens from a manufacturer of fine imaging products. Whatever you attribute it to, there is no denying the beauty of the photo.


Everyone read(or should have read) a few days ago when I talked about Mpix Pro, and how they will send you 5 free 8X10's to check monitor calibration. Well a couple of people have asked me about sizing your images to send to them. Lets take a look at how to do that.

This is a simple technique that we're going to talk about here. Just cropping, but you want to make sure that when you crop your image, you make the resolution the correct count otherwise you will have a fuzzy image. So open your image in Photoshop. Click on the crop tool in your tool bar on the left side of the screen. When you do this you will see a couple of boxes appear on the menu bar across the top of the screen. The first one is width, click in that box and type 8. Next is height, type in 10 in that box. The third and final empty box is PPI or pixels per inch. This is where the confusion lays. For sending images to the printer you can get away with any resolution from 240ppi to 300ppi. Mpix Pro requests that you make the resolution 300ppi, but most printers suggest 240-300. That's for printing, but what if you are just resizing an image for the Internet? The setting most used for the Internet is 72ppi. This does two things. First it keeps the image small enough that uploading doesn't take an extended period of time. Secondly it somewhat, prevents people from stealing your images. If you try to enlarge a 72ppi image much larger than a 4X6 it begins to get grainy and unrecognizable. So for the web my settings are usually this: width 4inches, height 6inches, and resolution 72ppi. There you have it. You should be resizing like a pro... Have a great day everyone. See you tomorrow. Jason
Read more on this article...

Thursday, July 30, 2009

Nikon News


Here's another shot of Matt and Tomi. They were so much fun to work with that I can't resist sharing them with everyone a little more. For this shot I use an 85mm f/1.8 Nikon prime lens. Keep the aperture wide open and blur the background. Great stuff. Speaking of Nikon, as predicted(by not just me) They released the new camera's and lenses today. You can read about them HERE. All of the things that I predicted a couple of days ago came true. D300s with video, extra card slot, and not much else. D3000, 70-200VRII, and 18-200VRII. Nothing earth shattering out of any of them. Look for a D700s soon that will add the benefits of the D300s. It will have an extra card slot just like the 300... Pre order them from places like ADORAMA or B&H. It'll be mid August before they're shipping.

The specs on the D3000 look kind of blah. It's basically the same specs as the D40x. It adds 11point AF, dust removal system, SLOWER flash sync speed... Get a D40 you'll be happier.

The D300s adds a SD slot, 1 extra FPS, video, 1 button live view(because we all shoot in live view sooooo often right...), it does add the Virtual horizon that is standard in the D700 which is nice. That's really it on the D300s. Nothing that's going to make me run out and sell my D300 to buy one.


Ok, that's all I've got today. I have to get to some editing. See you all tomorrow. Jason Read more on this article...

Wednesday, July 29, 2009

The Kelby Three Step Portrait finishing made easy


Hey everyone, hope you all had a great day yesterday. We presented the umbrella photo to the client yesterday. She didn't like the dark sky, or the size of the logo. Made the changes right there for her, she was happy. We are licensing the image to her for use in advertising but for prints, customers have to come to us. So if you live in Bellevue and would like a photo/poster etc. of the umbrella shoot, let me know. We are printing them with and without the logo. The shot you see above was taken last Sunday during an engagement session with a bride and groom for one of our upcoming weddings. I didn't take the photo, Shad did. I only took a hand full of photos that day as I was playing reflector boy(we alternate who does the reflector/light holding from shoot to shoot). Anyway, I have been reading Scott Kelby's book on Photoshop CS4 and in there he discusses his Three Step Portrait Finishing technique that I thought would work well for this particular portrait. Any of you that know me though, know that I'm not one to leave well enough alone, so I did a little automation and made this process into an action that I am going to share with you today. To start here is the beginning image:

DSC_8340

Open the image in Photoshop. Then before you do anything else select your actions panel and click on create a new action at the bottom of the panel. The create new action icon looks like the small post it note and is the second from the right at the bottom.

Threestep1


The first thing you want to do is go to IMAGE-MODE-LAB COLOR. This will convert your image to LAB COLOR mode. Once you have done that, click on your CHANNELS tab in the CHANNELS TOOL BOX(if you don't see CHANNELS in your tool boxes selection go to the top menu bar and select WINDOW then click on channels). Once in the CHANNELS tool bar select the LIGHTNESS channel. When you click on LIGHTNESS it will change your image to black and white(don't worry the color isn't gone). Now click at the top of the screen on FILTER-SHARPEN-UNSHARPEN MASK. A dialog box will pop up. Here are the settings you want:

threestep2

When you are done, click OK. Now go back to IMAGE-MODE-RGB. Now duplicate your background layer by pressing CTRL+J. Now select your copied layer which should say LAYER 1 in the layers box(again if you don't see the layers box, click on WINDOW and select LAYERS). Go to your top menu and select FILTER, then GAUSSIAN BLUR. Set your radius to 20.5 then click OK. Now in the LAYERS dialog box, select the OPACITY and reduce it to 20%. The next thing you're going to do is merge your layers. You do this by pressing CTRL+E. This will merge your visible layers.

Now duplicate the layer that you have by pressing CTRL+J. Click directly above the new layer in blending mode. It will say NORMAL. Change this to MULTIPLY. This will make your image appear dark. Don't worry, we're going to fix that. This is something that isn't in Scott's book, but is very important when making the action. The next step in the process is to select the rectangle Marquee tool and draw a box in the image. Every image is different so you will want to change the size of this box depending on the image. To do this in an action, you have to insert a STOP. To do this you right click on the small box in the upper right hand corner of the ACTIONS box. Under that menu, you will see the command INSERT STOP. Click on it.

Threestep3

When you do you will get a small box that pops up and allows you to insert some text. Here is what I put in my text box: "Press stop and use the Rectangle Marquee tool to select a box roughly 1/2 to 1 inch in from canvas edge. Once you have completed the selection Press the action button again to continue". Do not click on the little box that says Allow continue. This would allow you to bypass this step, and you don't want to do that. Now, since you are making the action currently, you will have to go to the bottom of the actions box and press the stop button so that you can actually make your selection. The stop button is the little square box on the far left of the actions menu at the bottom.

Once you have pressed that stop button, select your rectangle marquee tool(like the text in your box says) and draw a box inside of your image. This box should be roughly 1/2 inch to 1 inch from all of the sides but it doesn't have to be perfect. Now go back to the bottom of your ACTIONS box and press the record button. It is the second button from the left and is a small circle. Once you have done this click the small box above your image in the tool bar that says REFINE EDGE. When you do, you will get a pop up that looks like this:

Threestep4

Use the settings shown here. Make sure that you have the blue box at the far left of the pop up selected. Once you have done this, click ok. Now press the DELETE OR BACKSPACE button on your keyboard. This will delete part of the MULTIPLIED LAYER. Once you have done this, press CTRL+D to deselect. Now all that is left is to press CTRL+E to merge the final layers and you're done. Press stop once again at the bottom of your actions box. You are done.

When you run this action on a photograph, a pop up will appear when it gets to the point in the action where you placed the STOP and the dialog box. When it does, there will be a button that says STOP on it. Press that button, then make your selection with the marquee tool. Once you have made your selection, press either the play button again at the bottom of your ACTIONS box, or if you are in BUTTON MODE for your actions, just press the action again(it will be colored in red until you press it again). That's it. Simple, automated portrait finishing. Puts a nice vignette around your image, as well as gives the image a dreamy look while still keeping thing sharp. Great stuff!

Enough from me. I have some editing to do. I'll see you all tomorrow! Jason
Read more on this article...

Tuesday, July 28, 2009

Sneak Peek


Good morning all. I thought I would give my blog readers a sneak peek at the image being delivered to the City Of Bellevue today. This is the final version of an image that was taken by Shad. Here is the original:

DSC_8318

As you can see I spent hours duplicating the umbrellas, adding cloudy sky, and pumping up the colors. There are over 60 layers in this composit! Look for this on your local news channel in the next couple of days(if you live in Cincy) as they will be sending out a press release to all of the news agencies.

New Nikon Gear! Thursday Nikon is going to be releasing some new gear. I have a "contact" per-se at Nikon that confirmed for me this morning via email that this Thursday Nikon is going to release two new bodies as well as two new lenses. We will have the new D300s, D3000, 18-200 VRII, and 70-200 2.8 VRII.

The improvements on the D300s over the original D300 will be the addition of video capability, added SD card slot along side the CF card slot, and a few other minor upgrades. To me it's not Earth shattering. Not enough to make me dump my D300's and go buy these...

The D3000 is going to be a replacement for the D40. Entry level SLR. I look for it to have one of the key features of the D40 missing. I expect that the flash sync speed will be 1/250 instead of 1/500 which is one of the great features of the D40. Also I expect that it will have no AF motor like the other Consumer SLR's offered by Nikon.

As for the New lenses, we'll just have to wait and see. The AF motors will probably be faster. The lens elements will most likely be coated with the Nano Crystal Coat that all of the new Pro lenses have been shipping with. The real question is going to be whether or not the price of the used 70-200 2.8's goes down or not. It is such a great lens, that I am expecting the price to stay the same for a used model. Somewhere in the neighborhood of $1400 to $1600. So there you have it. My expectations and predictions for Thursday.

Ok that's all I've got for today. I have an awesome photoshop tutorial lined up for tomorrow as well as how to create the action to automate it so make sure you stop by tomorrow to check that out. See you then! Jason
Read more on this article...

Friday, July 24, 2009

Wide is the Way to go


Hey everyone. I'm glad you made it back to read a little more from me. Lots has been happening in the past few days of the photo world. Mpix has a new service aimed specifically at professionals. They have all sorts of added products and offerings that professionals will appreciate. To apply for their pro services click Mpix Pro.
Nikon has had some issues with the D5000. If you have one read their latest press release Here. They are recalling some D5000's with specific serial numbers. Hopefully you read my post all about this camera and didn't buy one anyway. They're not worth the money.

You know what is worth the money? This great little lens right here:

tokina12-24

This is the Tokina 12-24 4. Now I have raved all about their 11-16 2.8 for over a year now, but I have just had a chance to test, and subsequently purchase this wonderful lens. So what's so special about this lens? Read on...

The Tokina 12-24 f/4.0 is one of the sharpest, well made third party lenses that I have had a chance to use. This thing is awesome. It is has great build quality, and an affordable price. Just under $500 HERE. Ok so we know it has good a good build, and a cheap price, but why do you need a 12-24mm range? Because wide is gooood. Who doesn't like to see a nice wide shot, with no distortion... I love it. I love getting close to people and getting them, as well as a nice background in the image. I like getting My son from feet all the way to head as well as the clouds in the background in this shot:

JRL_2001

I love the fact that I was only a couple of feet away, so that meant that my SB800 on the stand, camera left was only a few feet away. This made the power required to light him very minimal. This is great for recycle times, as well as strain on flash. Less power usage equals less strain on the flash.

So what about the numbers... This beautiful little lens has 13 elements in 11 groups. Internal AF motor so it will work on for you guys with the D40's and the D60's. It has a "Pro" 77mm filter thread as well as a nice supplied lens hood. It has 9 diaphragm blades so there will be a nice bokah on those small DOF shots. Great lens! Sharp from side to side, and minimal distortion. I'm happy to have it as an addition to my lens selection. Get one. Rent it or barrow it to try it out. I promise you'll be hooked on the wide angle stuff. Your significant other will be cursing me for turning you on to it. : )

That's it for me today. I have to get back out to the pool. Have a good weekend. See you all Monday!

Jason
Read more on this article...

Thursday, July 23, 2009

Taking your settings with you


Hey everyone. Glad you made your way back. If you read yesterdays post I told you that I just upgraded to Photoshop CS4 a few days ago. It's better than I could have ever expected. Over the next couple of weeks I'm going to cover some of the new features included in this new version, but first we have to get all of our settings, actions, and brushes converted over from CS3. If you haven't been using Actions, keyboard shortcuts, and specialized brushes, why not? These are all things that make life a whole lot easier when working in Photoshop.


As a side note, even if you aren't upgrading at this point, you may want to read about how to do this stuff and do a backup of all of these settings, just in case something happens to your computer.

Open photoshop. Got to EDIT-KEYBOARD SHORTCUTS this is what will pop up:

SS1

Now if you don't have any specific keyboard shortcuts, then you don't have to worry about this step because the same "default" shortcuts already come pre-loaded in CS4. I have changed my shortcuts to make my life easier. So once in shortcuts, click on the small "disk" icon in the upper right hand side of the box. I have my cursor pointed directly over it in this photo. By default it will open up the Keyboard shortcuts file under the Photoshop folder in your program files section of your hard drive. I have a folder that I keep all of my external photoshop files in under the My Documents tab. So I selected that folder and named my file Jason's Keyboard shortcuts. Click ok to save and you're done with that. Now in your Actions panel click the drop down menu in the upper right hand corner of the box. If you are in button mode, uncheck that selection and then move down to your actions set. (if you haven't made a custom actions set to save your files in, you need to do that first by clicking on "create set" in the ACTIONS drop down menu) Click on the drop down for the ACTIONS box again and click "save actions". It will look like this:

SS2

Again I have the folder in "My Documents" where I keep all of my photoshop external files. I saved the actions set there.

Last but not least for me was to save my brushes to transfer to CS4. I have acquired a pretty good collection of different brushes and I wanted to take those with me to CS4. So click on the brush tool over on the left hand side of your screen. When you do a dropdown box will appear on the menu bar at the top of the screen. Click on this dropdown where it says BRUSH. Now on the right hand side of the screen you will see a small arrow inside of a circle. Click this. It will bring up a menu similar to the Actions menu we saw earlier. It should look like this:

SS3

Click on save brushes. At this point you should know where I'm going to save the file for this(in my documents). Save the file there and close CS3..

Once you have CS4 installed, you will repeat the above process, except instead of clicking on save brushes, you click on load brushes. Easy and simple.

I'm done for the day. I need a nap so I'll see you all tomorrow! Jason
Read more on this article...

Wednesday, July 22, 2009

Bellevue Umbrellas


Hey everyone! This is a setup shot from our photoshoot on Sunday. We arrived around 6AM to the city of Bellevue to start preparing for the morning. Bellevue decided to change up some of their promotional materials and wanted to get the word out. Since our studio is located in Bellevue, naturally we wanted to be part of it. They printed their new logo on a bunch of bright yellow umbrellas to pass out to people during the "Shop Bellevue" event. Shad had the great idea to get a bunch of people out there in the street with the umbrellas and get some shots from up high. The city arranged a "cherry picker" and we got to work. We got some great stuff that morning including this shot of the people that showed up to hold umbrellas:

DSC_8318

Now this is a fine shot. It shows the umbrellas, the shops, etc... But we were hoping for about double the turnout of people to hold umbrellas. I went to work...
Using photoshop CS3, and the magnetic lasso tool I selected different "umbrella groups" and copied them to new layers(50 in all). I then used the free transform(CTRL+T) to rotate, resize, and position the umbrellas where I wanted them. Here is what the shot should have looked like from the start:

DSC_8318-2

Unfortunately since we didn't have enough people to hold umbrellas I had to spend 4+ hours in photoshop adding content. Worth it in the long run because that image along with the shot below and an HDR image got us on channel 12 news Sunday evening. Always love free advertising!

JRL_1866

So I just upgraded to Photoshop CS4 last night. Not that there was anything wrong with CS3, but there are some added features in CS4 that I could just not pass up. I'm not ready to give any tutorials on these features yet, but I would like to give you a quick summary of what they are, as well as what they do.

Content Aware-Scaling This feature is HUGE. It allows you to "stretch" your image to fit whatever proportions you need, without distorting the image. If you have ever taken a digital photo, and said wow, that would look great as an 8X10 but when you tried to print it as an 8x10 things got cropped off, you'll love this feature.

Clone stamp preview This feature allows you to see what your clone stamp is going to look like before you stamp it. This is especially helpful if you are trying to clone along a strait line. You can now match up your lines before you actually stamp it.

Tabbed documents This allows you to have multiple open documents and keep them organized like never before.

Camera Raw improvements This is almost more like a complete overhaul of camera raw. It's interface now opens every type of photo file not just RAW files(similar to Lightroom) with white balance, clarity, as well as tone curves adjustment and a whole lot more. If you are familiar with working in lightroom's develop panel, you'll feel right at home here.

3D capabilities I don't really know exactly what they are, but I know that RC over at Photoshop User TV goes on and on about them. When I learn more about this feature, I'll pass along the info.

I'm sure there are some that I'm forgetting/don't know about, but these features alone are enough to justify the upgrade. Tomorrow I'm going to talk about how to transfer all of your preferences, brushes, actions, etc. over from CS3 to CS4. See you all then! Jason Read more on this article...

Monday, July 20, 2009

Monday, July 20th


Good morning everyone! Let me Start by Saying that if you attended last Saturdays Photowalk, Thank you! I had a great time, and met a lot of cool new people. If you haven't already checked out the Flickr group you can view it HERE. I can't wait to see what everyone got! I didn't take a whole lot of images because I wanted to spend my time conversing with everyone and thanking them for attending. What I did get was a couple of really cool HDR shots. Here is my favorite:

West Bridge

I'm not normally a big fan of HDR. I feel like it's kind of cheating, but then again some say the same thing about photoshop. For those who don't know, HDR stands for High Dynamic Range. Basically you are taking a group of shots, some over exposed, and some under exposed, and combining them to make one photograph. So here's how you do it...

First you have to take the images. Many cameras these days have what's called a bracket function on them. This is a setting that will tell the camera to take a series of photographs and make each one a different exposure. The way to set the camera to do this varies from model to model so refer to your user manual to set the camera to do this. What you get will be a series of images that look something like this:

JRL_1684

JRL_1688

JRL_1687

JRL_1686

JRL_1685

JRL_1690

JRL_1689

What this does is it captures the entire image from the darkest darks, to the lightest lights. Once you have these images you need to open them into an HDR program. Photoshop does have an HDR feature. You can access this by going to FILE-AUTOMATE-MERGE TO HDR. This works... but not very well. I have found that the best program on the market for creating HDR's is Photomatix Pro. I have photomatix pro 3.0 and I love it. The program is really simple to use, and it does a wonderful job. You can download a free trial of it HERE Here's a quick rundown of how to use it. When you first open the program it will look like this:

photomatix

Click on "Generate HDR" in the upper left hand side of the screen. A box will come us that tells you to select your images. Click browse, and then find the images you want to use for the HDR. Click ok, then click ok again when the pop up asks you if you want to create an HDR. At this point a small box will pop up that gives you the option of changing some settings around, I don't, I just click OK. Then it begins to create the HDR. It usually takes a few minutes then it pops up a photograph. That photo doesn't look that great. You have to click on Tone Mapping on the left hand side of the screen and you should get something like this pop up:

Photomatix2

On the left hand side you will see an option called "Light Smoothing". This is basically the level of "HDR" you want. The further left you click, the more it looks like a cartoon. The further right you click, the closer it gets to reality. Once you select your amount, click "Process" at the bottom of the page. This will get you back to the main screen. Once there you can click FILE-SAVE AS to save the newly compiled image.

That's it! That's all there is to an HDR. I hope this helped some of you who had some questions about HDR, and how to shoot, and process it. I have a ton of editing from the weekend to get to, so I'll see you here tomorrow! Jason Read more on this article...